Easy No-Knead Bread
No-knead bread is one of the easiest ways to make homemade bread with minimal effort. The dough comes together with just a few simple ingredients and requires no kneading—time does all the work. Baked in a hot Dutch oven, the bread develops a crispy crust and a soft, airy inside, just like artisan bakery bread.
Why Bake Bread in a Dutch Oven?
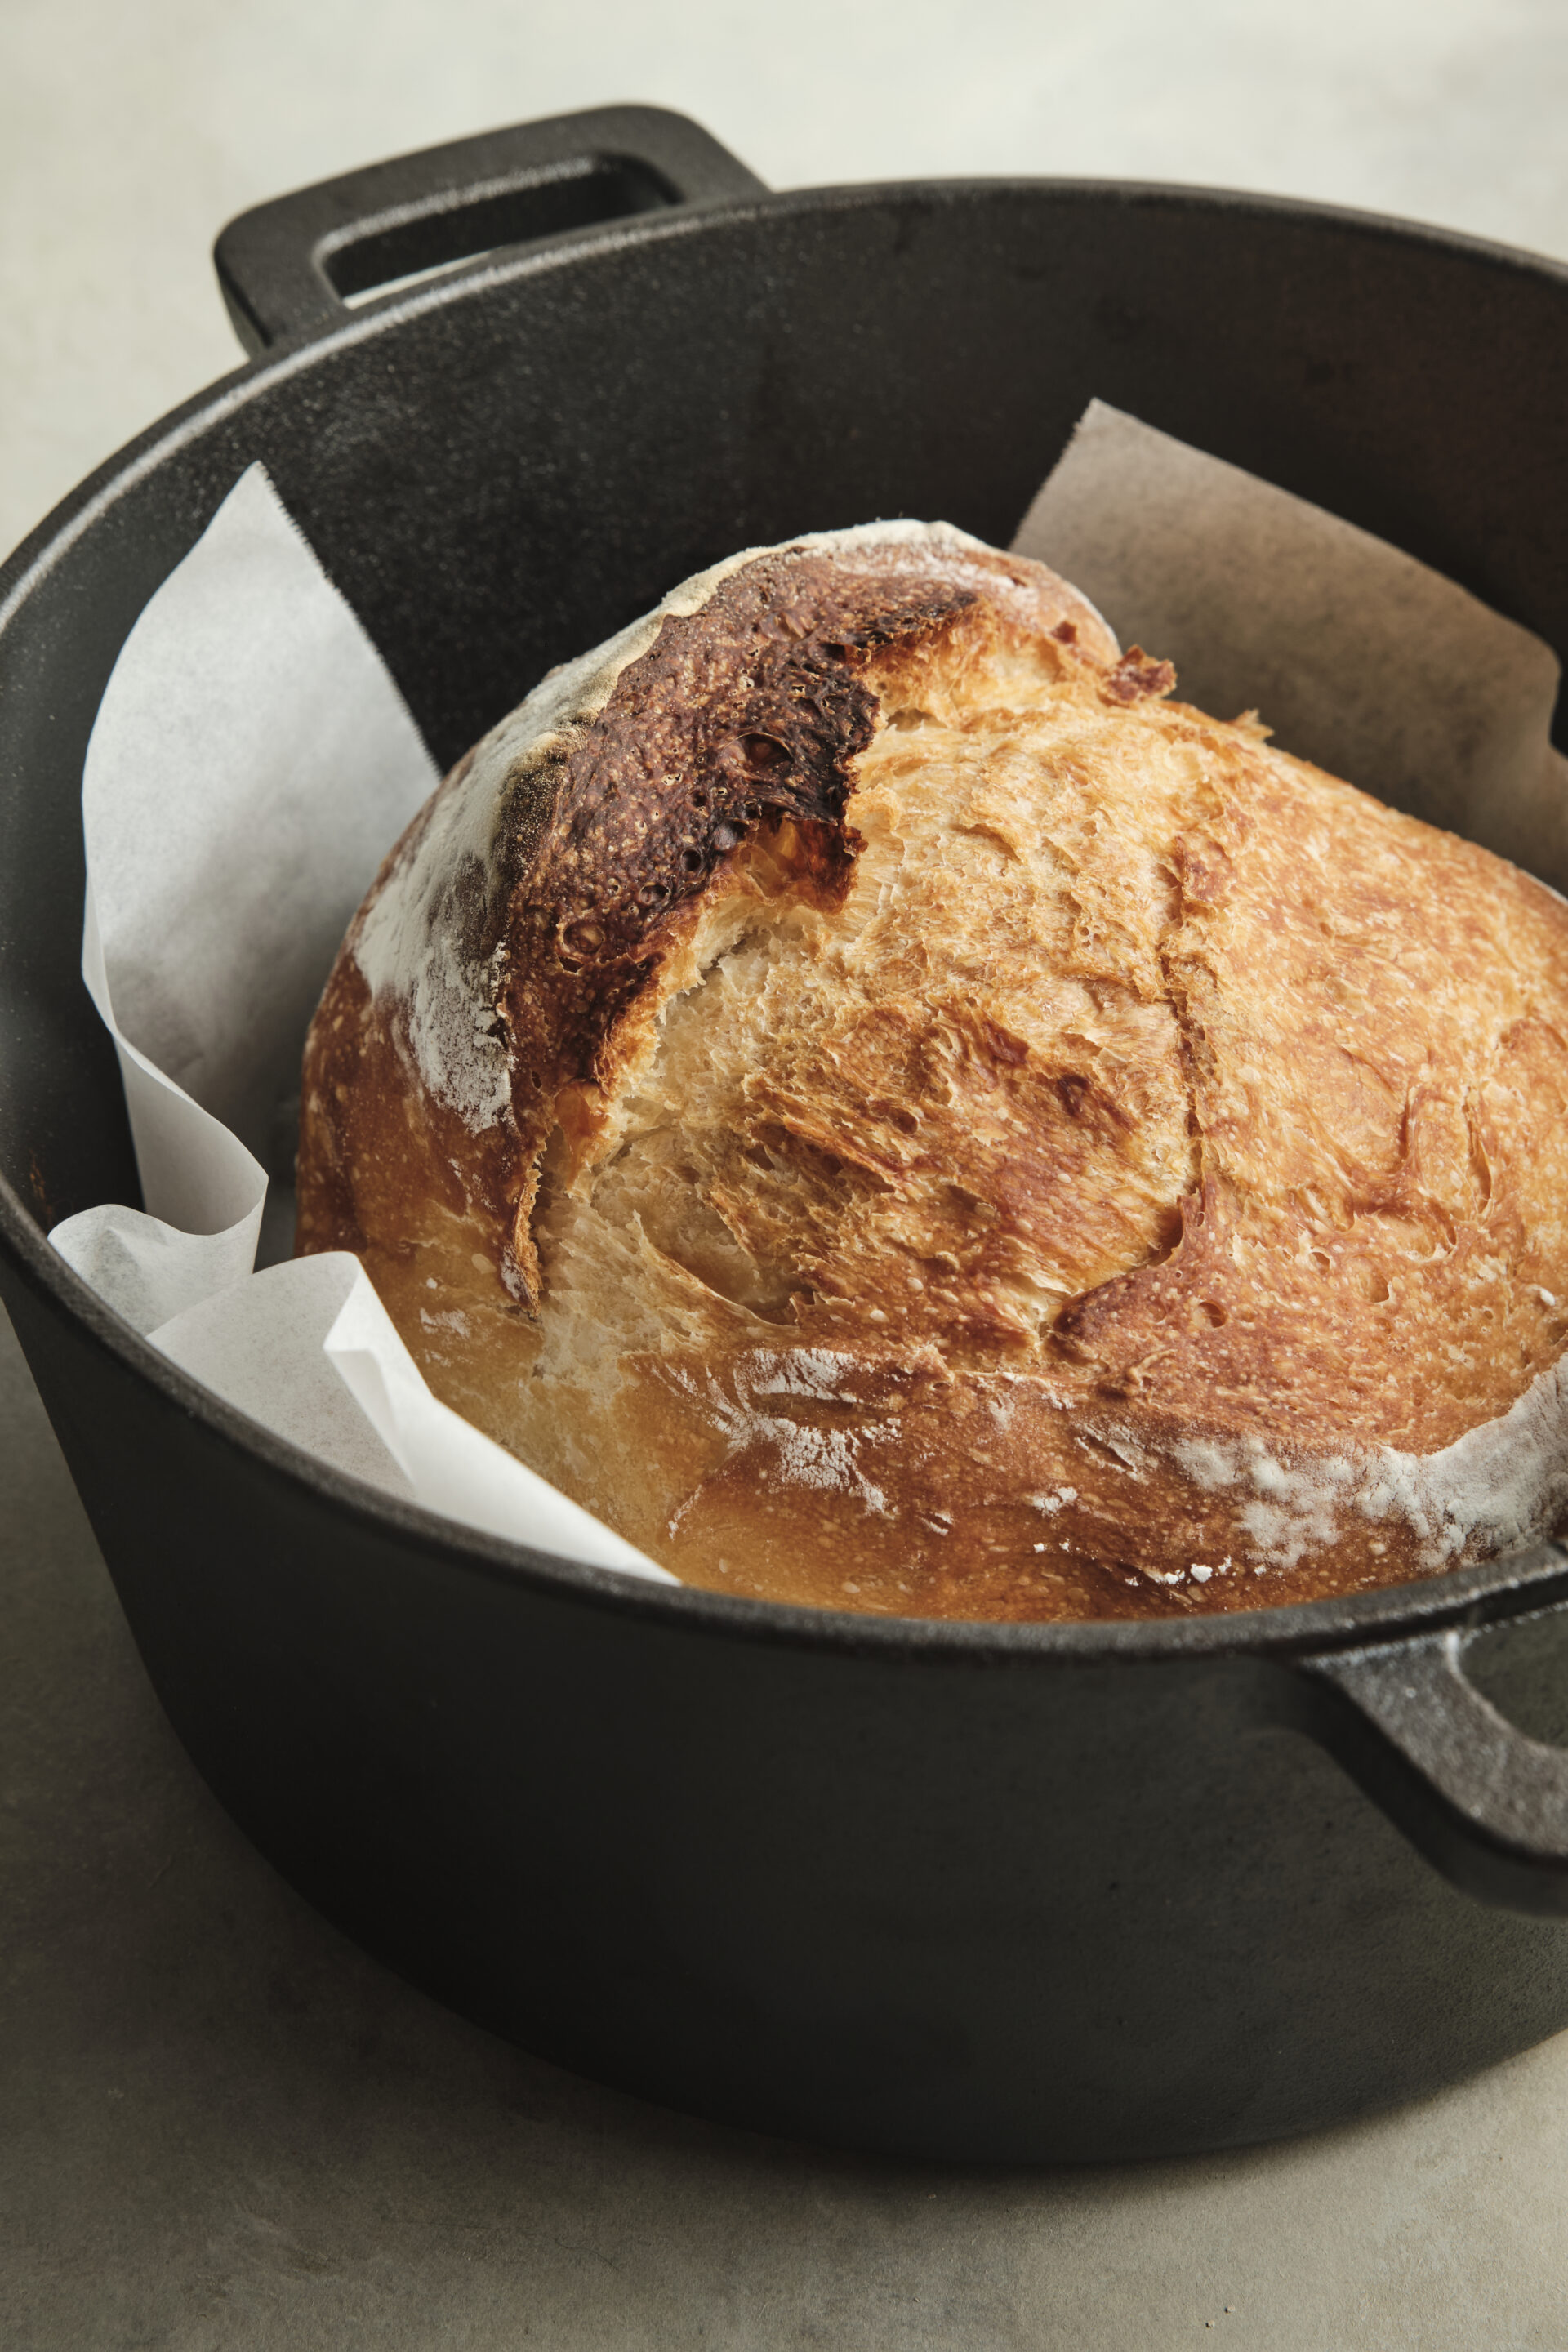
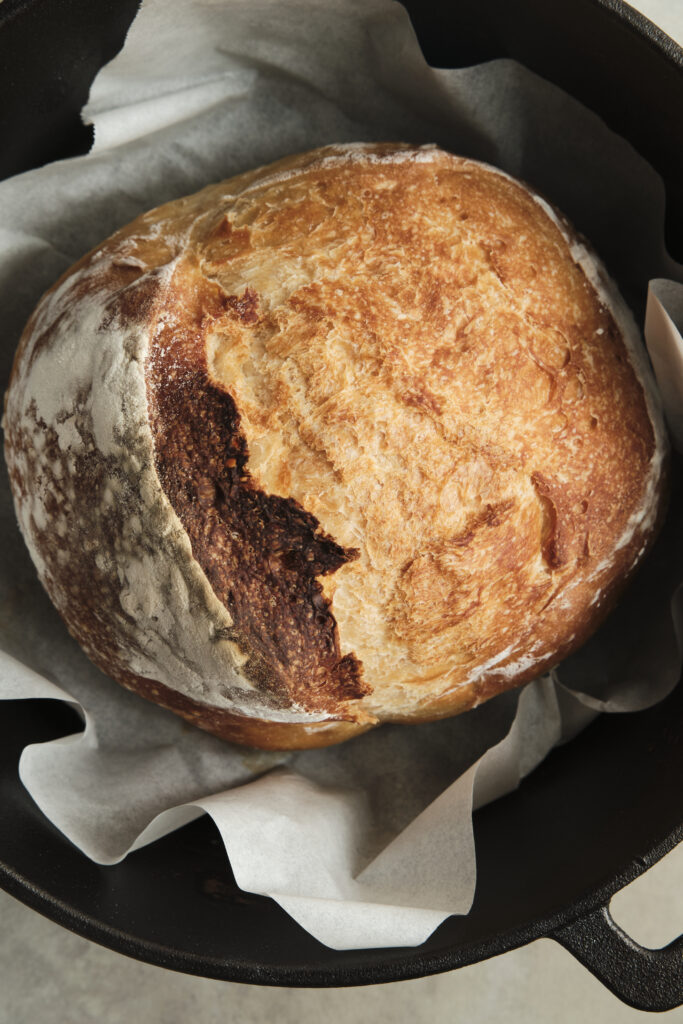
A Dutch oven is perfect for baking bread because it traps steam inside the pot while the loaf bakes. This steam helps the dough rise properly and creates that beautiful golden crust. The heavy pot also distributes heat evenly, which gives the bread a consistent texture and great flavor.
The Secret to a Perfect Crust
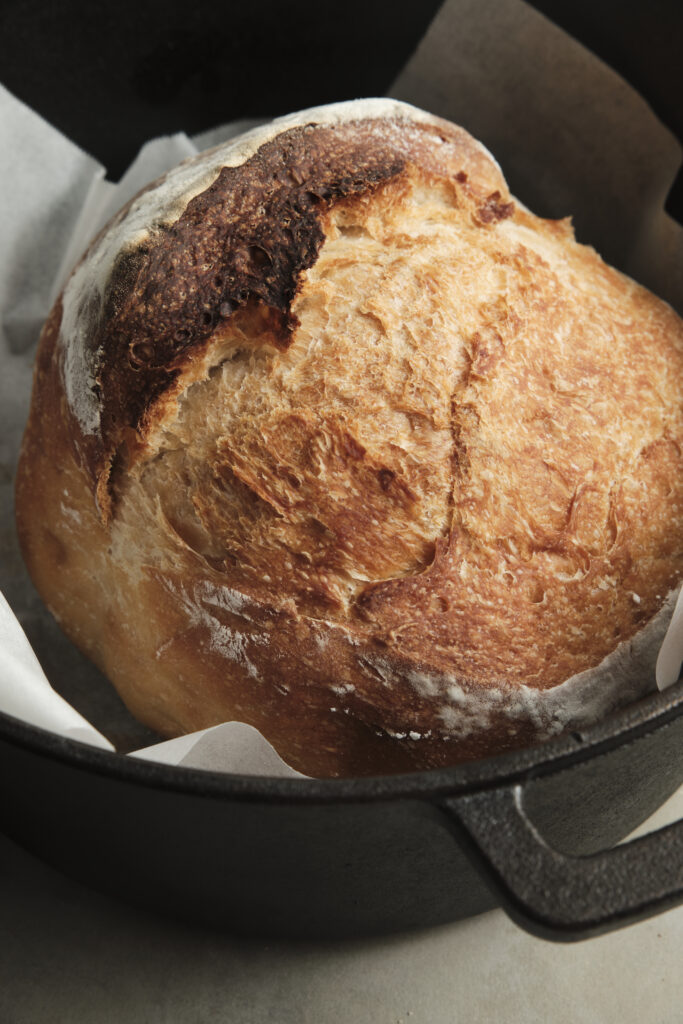
One of the best parts of this bread is the crunchy crust. Preheating the Dutch oven and baking the bread covered for the first part of the baking process creates steam that helps the loaf expand and develop a beautiful crust. Removing the lid during the final minutes allows the bread to turn golden brown and crisp.
Why You’ll Love No-Knead Bread
- No experience is needed to make it successfully.
- It requires very little effort and no kneading.
- It uses only simple pantry ingredients.
- It’s much cheaper than buying artisan bread.
- You can easily customize it with add-ins.
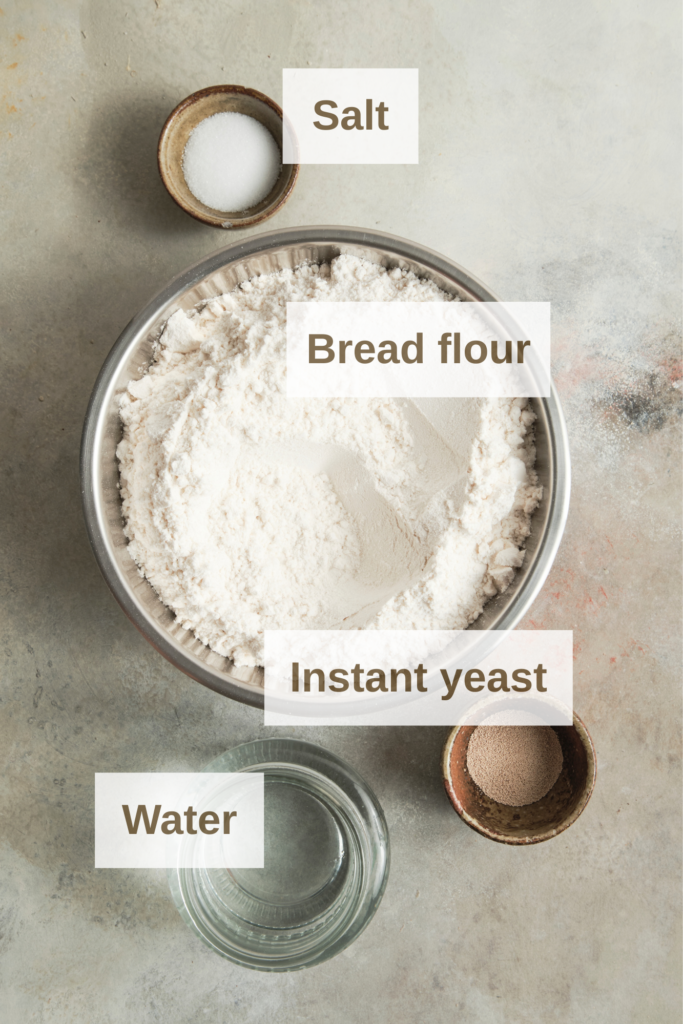
Key Ingredients
Bread flour – I love using bread flour because it gives the loaf that perfectly chewy, bakery-style texture that makes every slice feel special.
Instant yeast – This is my go-to because it’s so easy to use and consistently gives the dough a beautiful, reliable rise every time.
Water – Just simple water, but it works its magic by bringing everything together into a soft, sticky dough that transforms as it rests.
Salt – Don’t skip this, because it’s the key ingredient that enhances all the flavors and makes the bread taste truly delicious.
A visual walk-through of the recipe
Take a look at the step-by-step photos below for a visual guide to the process. You’ll find the complete written recipe along with helpful tips in the recipe card further down the page.
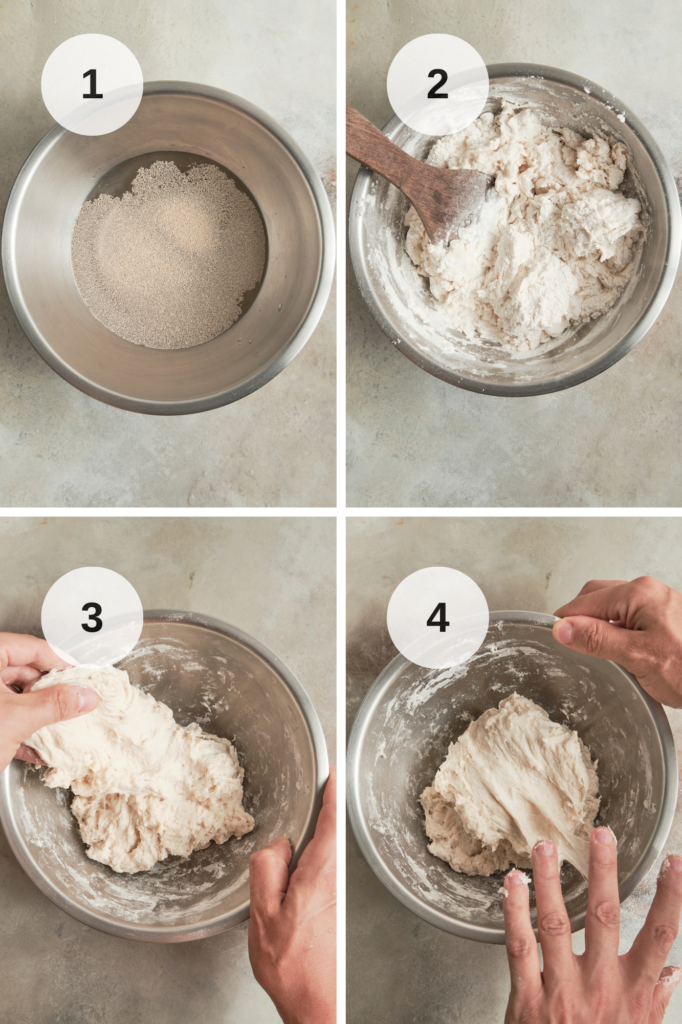
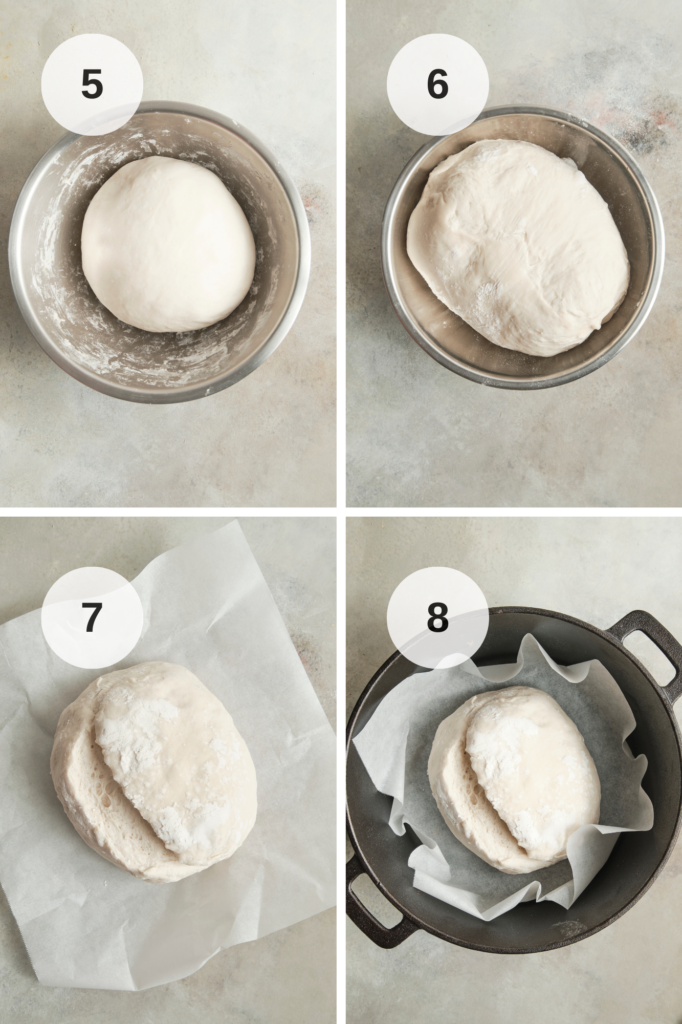
Make the dough – Mix all the ingredients in a bowl, cover with plastic wrap, and let the dough rest for 15 minutes. Over the next 1½ hours, perform three sets of stretch and folds, turning the dough upside down after each set. Then cover the bowl again and refrigerate the dough overnight for about 12 hours (Photos 1-4).
Shape the dough – Turn the dough onto a lightly floured surface and shape it into a round loaf by folding the edges toward the center. Place it on parchment paper, cover with a towel, and let it rest for 30 minutes. Meanwhile, preheat the oven to 230°C (450°F) with a Dutch oven and lid inside for about 30 minutes. Before baking, score the top of the loaf with a sharp knife or razor blade. Carefully transfer the dough into the hot Dutch oven using the parchment paper (Photos 5-8).
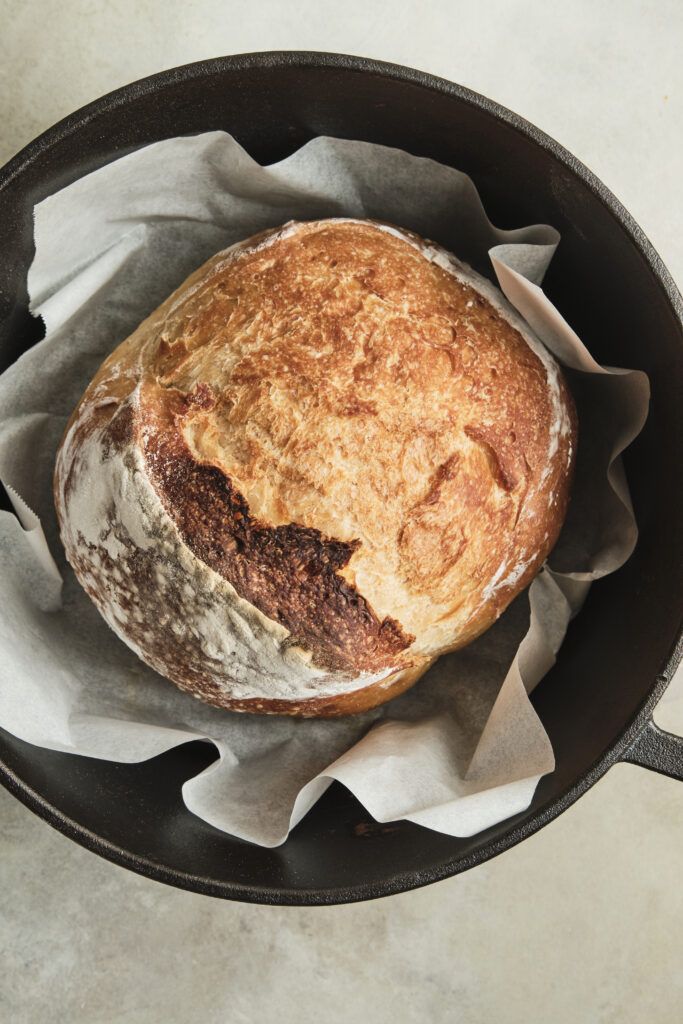
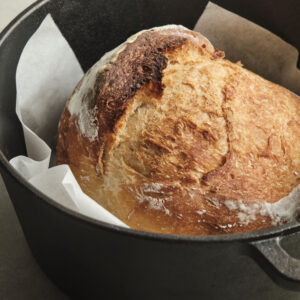
Bake the bread – Cover the dutch oven with the lid, and bake for 30 minutes. Remove the lid and continue baking for 10–15 minutes until the crust is golden brown. Take the bread out of the Dutch oven and let it cool on a wire rack for at least 30 minutes before slicing.
Homemade Bread Made Simple
Making bread at home doesn’t have to be complicated. This no-knead Dutch oven method proves that with a little patience and a few pantry ingredients, you can bake a delicious loaf of artisan bread right in your own kitchen. Once you try it, it may become one of your favorite homemade recipes.
From my kitchen (Chef’s Notes)
Hands-off magic
One of the best things about no-knead bread is how little effort it takes. You don’t need a mixer or hours of kneading—just time and patience, and the dough transforms beautifully on its own.
Dutch oven is key
Baking in a Dutch oven creates steam naturally, which is what gives the bread its signature crust. The lid traps moisture while the heat is intense, resulting in a loaf that’s crispy outside and soft, airy inside.
Flour and hydration
I always use bread flour for structure, but you can experiment with a mix of flours for extra flavor. The dough is quite wet—don’t worry, that’s normal. High hydration is what gives it those lovely open holes inside.
Timing matters
I usually let the dough rise for 12–18 hours. Overnight fermentation develops deeper flavor and improves texture. The wait is worth every bite.
Preheating the Dutch oven
Always preheat the Dutch oven in the oven first. This ensures that when the dough goes in, it starts baking immediately, giving you that perfect crust.
Scoring
A quick slash with a sharp knife or lame before baking lets the bread expand naturally. I like to make a simple long cut down the middle—it gives a rustic look and helps prevent cracks.
More Bread Recipes
Check out these other delicious bread recipes you might enjoy:
Easy No-Knead Bread
Ingredients
- 3 1/2 cups bread flour
- 1 1/2 cups water
- 2 tsp salt
- 1 tsp instant yeast
- 1 tbsp honey
Instructions
Make the dough
- Mix all ingredients in a bowl, cover with a plastic wrap and let rest for 15 minutes.
- Over a period of 1 1/2 hours, do 3 sets of stretch and folds, flipping the dough upside down after each set.
- Cover the bowl with a plastic wrap and place in refrigerator overnight for about 12 hours.
Shape the dough
- Lightly flour your work surface and gently turn the dough out of the bowl. Shape it into a round loaf by folding the edges toward the center. Place the dough on parchment paper and cover with a towel. Let it rest for 30 minutes.
Preheat the oven
- Place a Dutch oven with the lid into the oven and preheat to 230°C (450°F) for about 30 minutes.
Bake the bread
- Just before transferring the dough into the hot Dutch oven, use a sharp knife or razor blade to make a deep cut across the top or side of the loaf. This cut allows the bread to expand properly while baking and helps create a beautiful artisan-style crust.
- Carefully remove the hot Dutch oven from the oven. Using the parchment paper, transfer the dough into the pot. Cover with the lid and bake for 30 minutes.
- Remove the lid and bake for another 10–15 minutes until the crust is golden brown.
- Remove the bread from the Dutch oven and let it cool on a wire rack for at least 30 minutes before slicing.
Notes
Heating the Dutch oven before baking is important. The hot pot creates steam, which helps the bread rise and develop a crispy crust. Use parchment paper
Placing the dough on parchment paper makes it easier and safer to transfer the dough into the hot Dutch oven. Let the bread cool before slicing
Allow the bread to cool for at least 30 minutes. This helps the crumb set and prevents the inside from becoming gummy. For extra crust
Bake a few minutes longer without the lid if you want a darker, crispier crust.