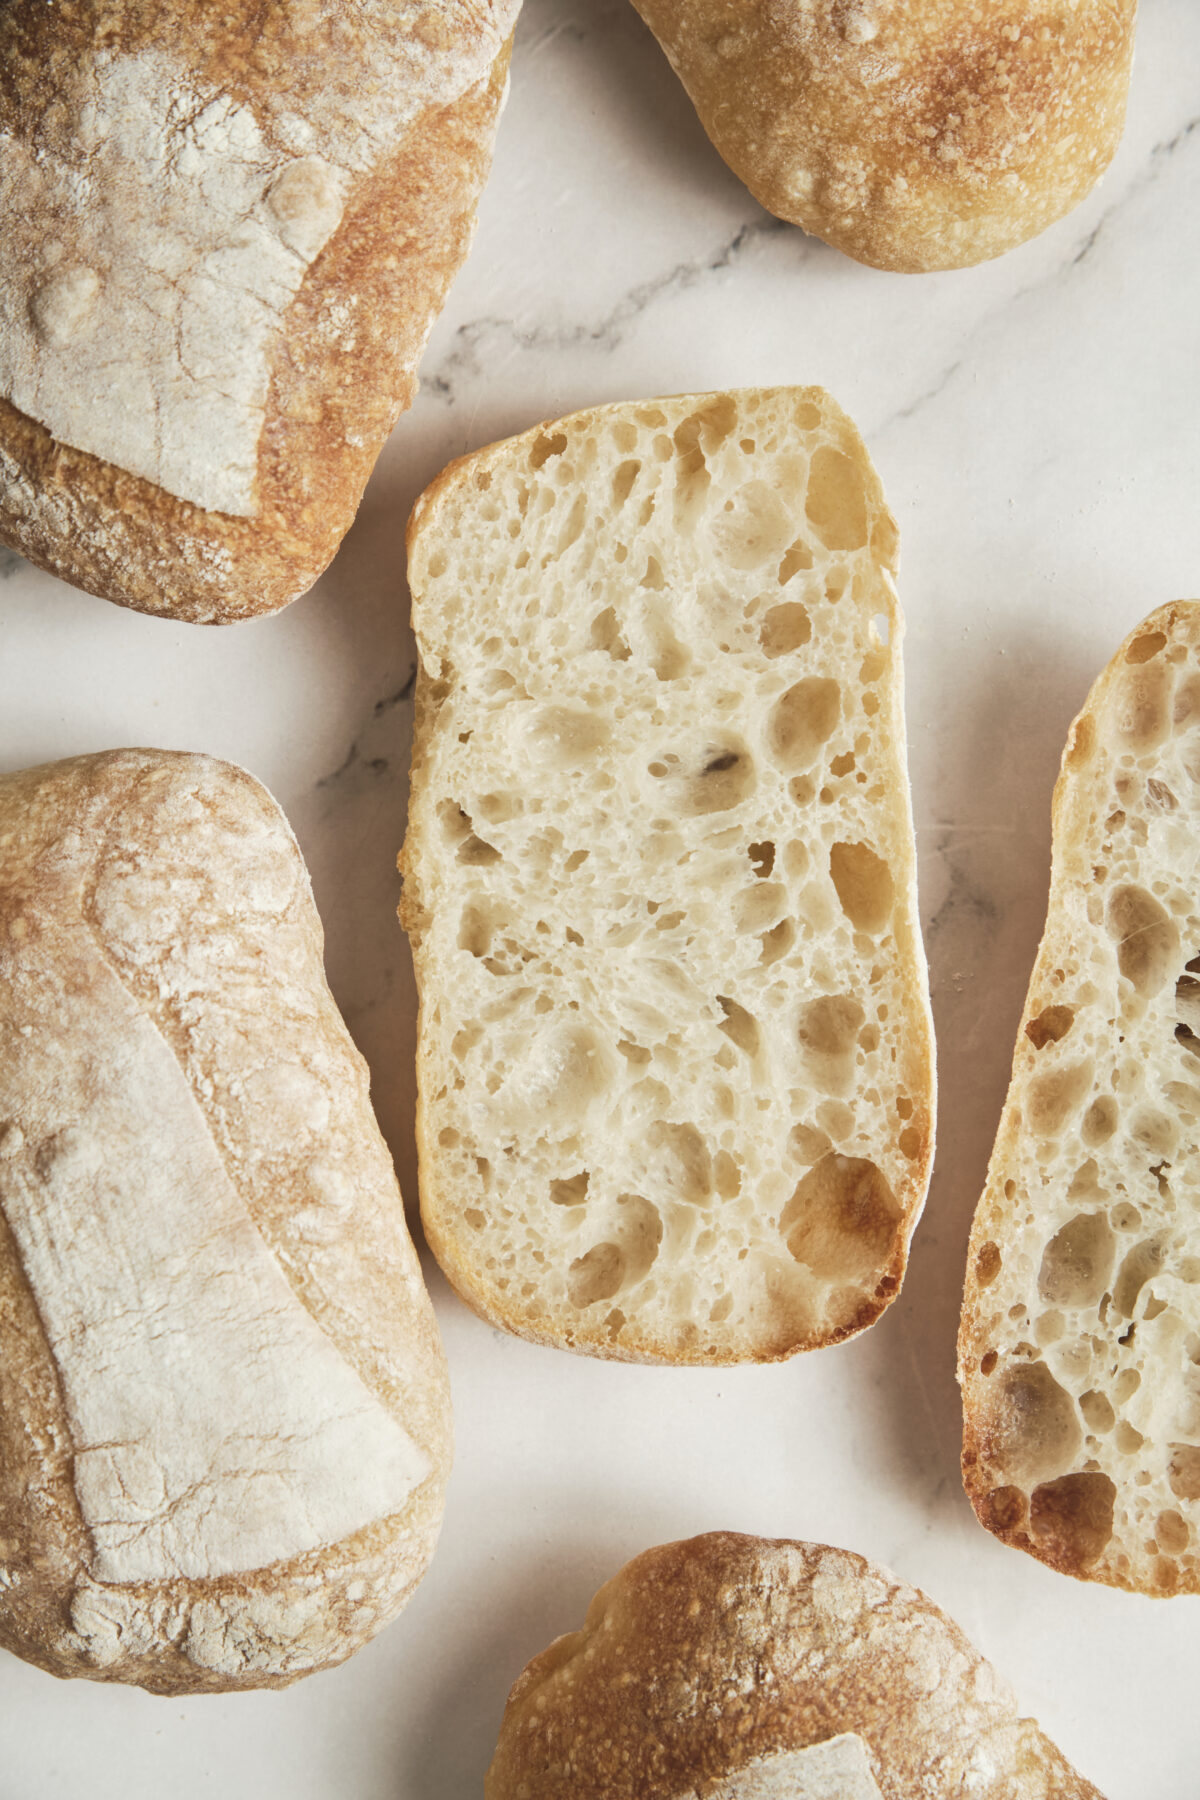
How to make Ciabatta Bread
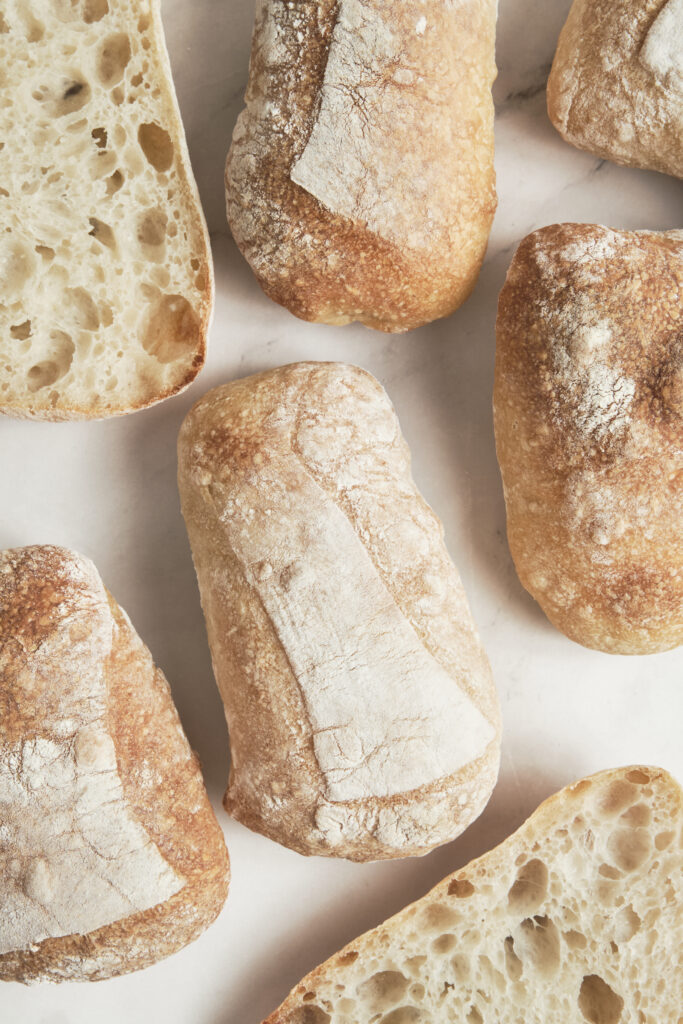
This easy ciabatta bread recipe creates crusty, airy homemade bread with just five simple ingredients. It’s one of my favorite easy homemade bread recipes for beginners because the dough is simple to prepare and can be made ahead of time. Use it to make two classic ciabatta bread loaves or soft and airy ciabatta rolls.

Rustic Homemade Ciabatta Bread Made Simple
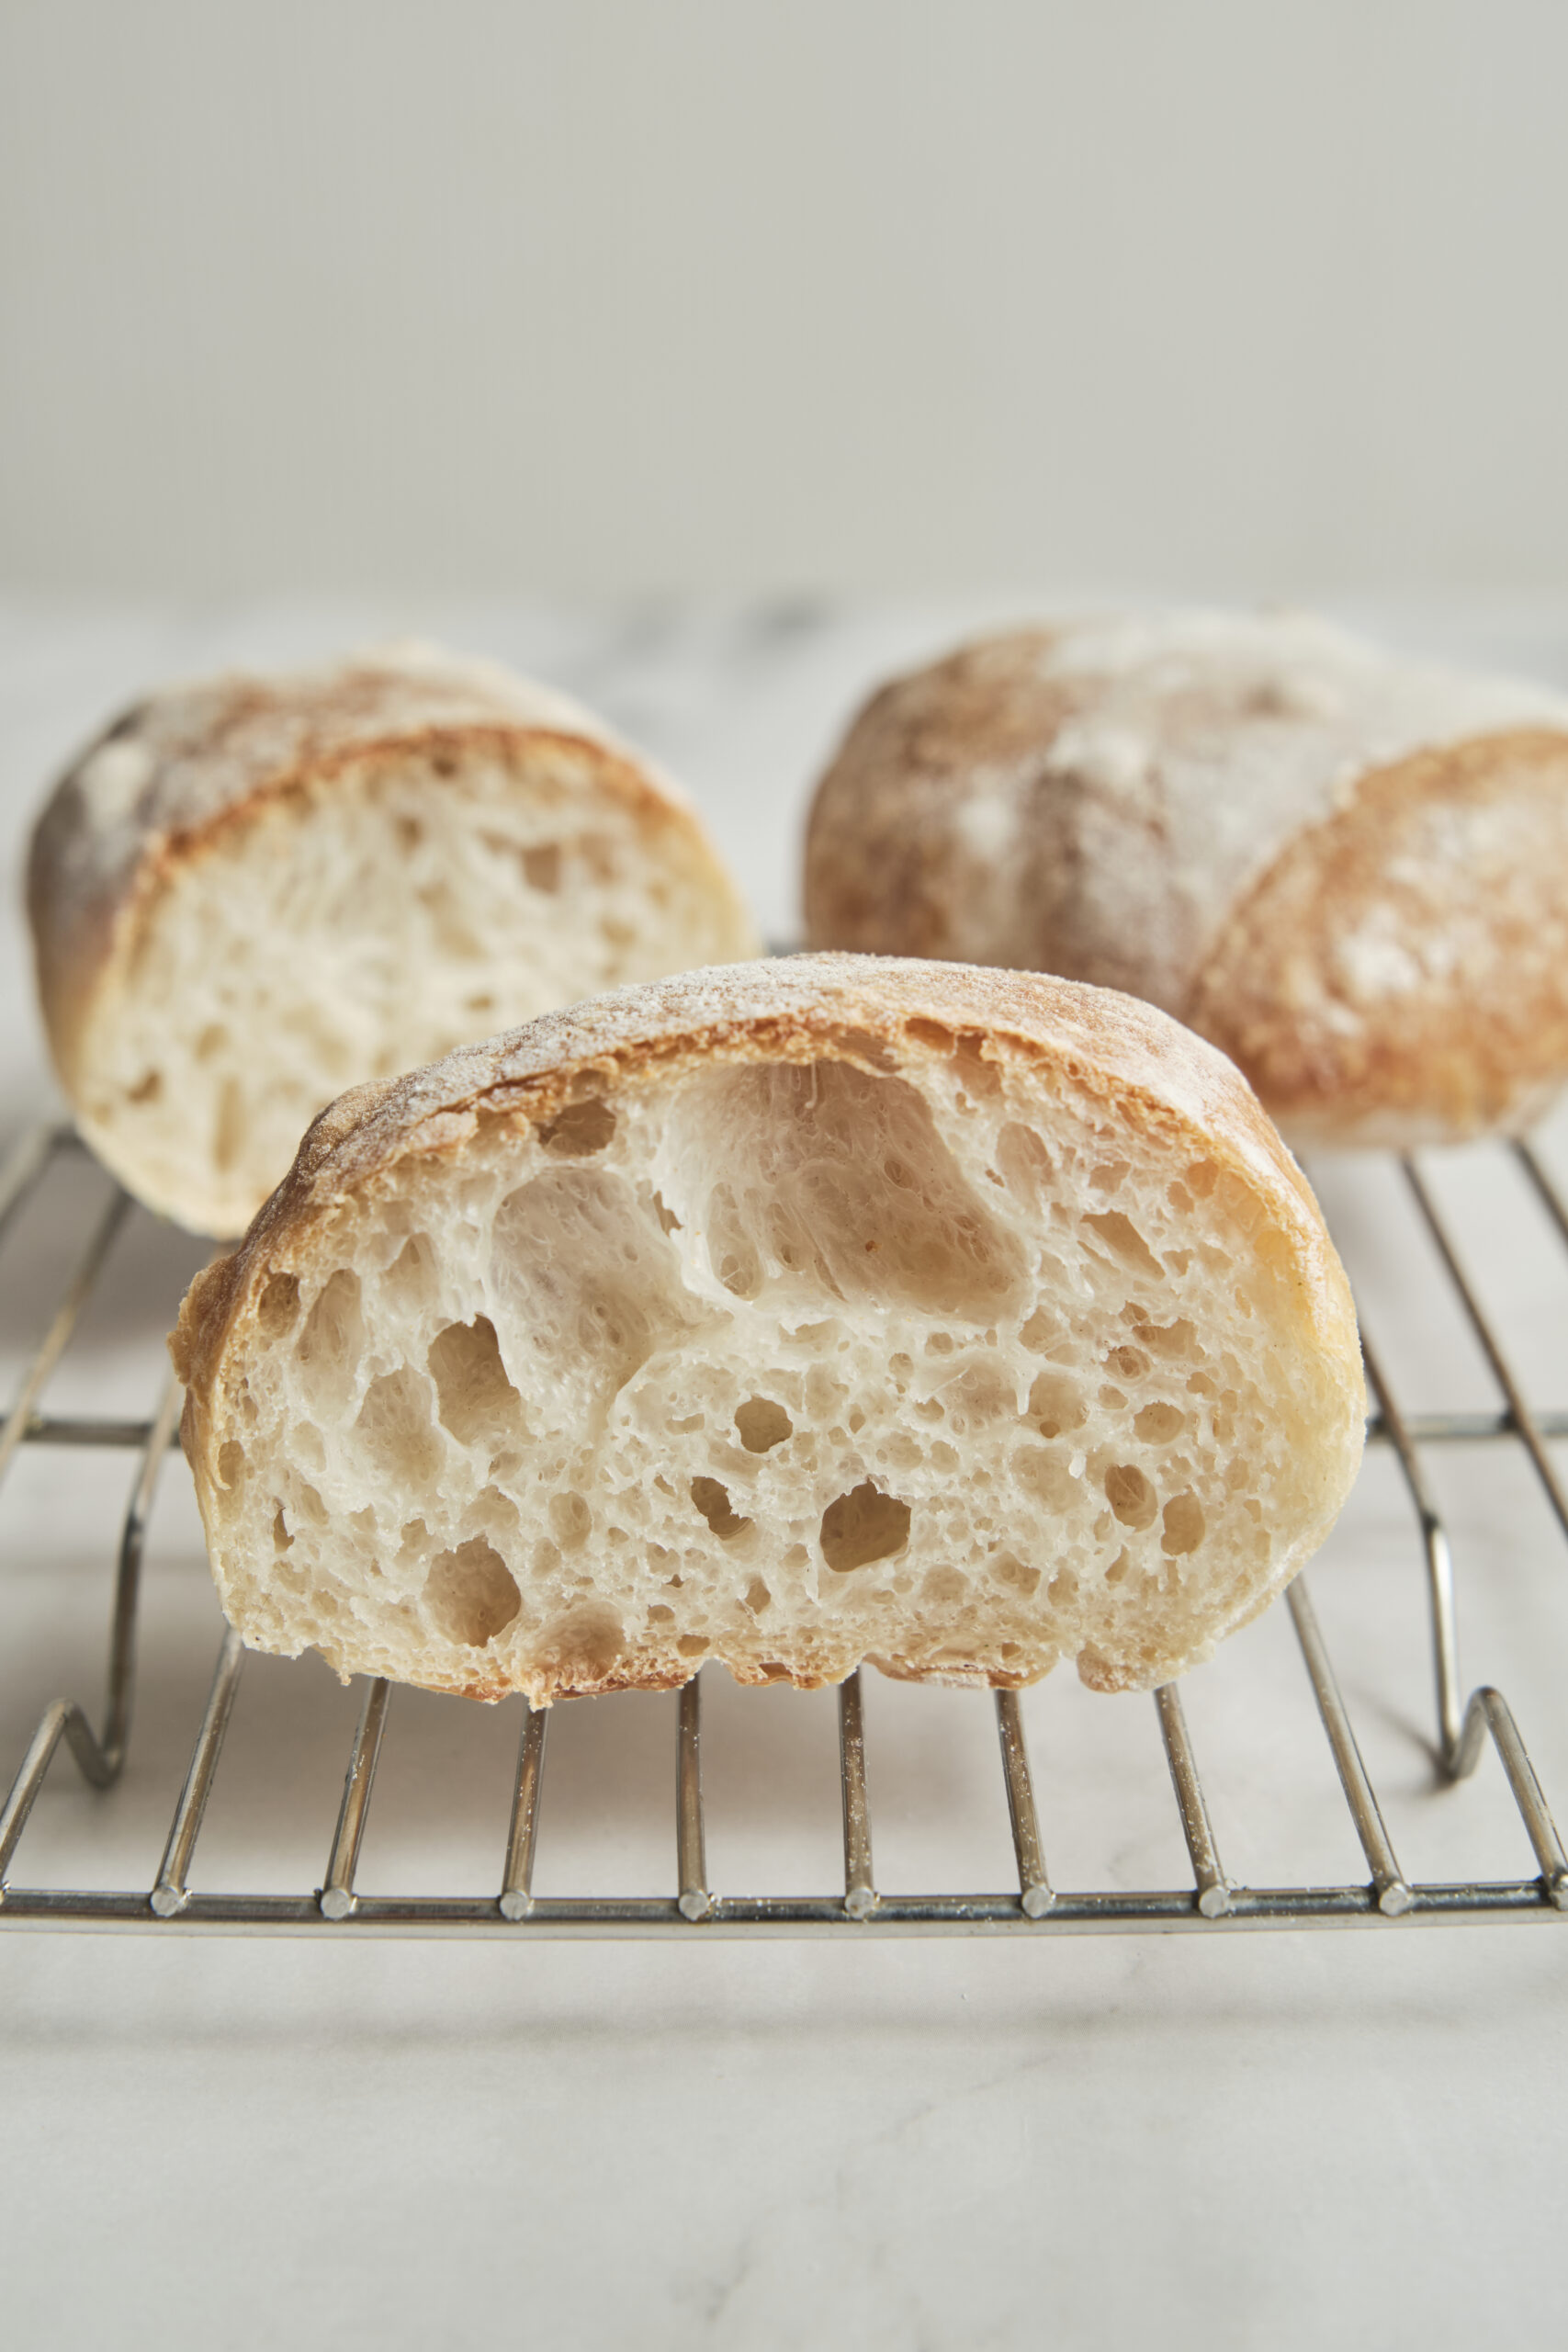
As a chef, I’ve always loved recipes that give incredible results without overcomplicating the process, and this ciabatta bread is exactly that kind of recipe. It’s rustic, deeply flavorful, and surprisingly easy to make at home. The dough comes together with minimal effort and uses a slow overnight rise to create that classic chewy texture, airy crumb, and crispy crust that makes ciabatta so special.
Ciabatta actually means “slipper” in Italian, which perfectly describes its flat, rustic shape. And honestly, once you bake it yourself and hear that crust crackling as it cools, it’s hard not to make it on repeat.
Why You’ll Love this Ciabatta Bread
- Foolproof recipe – If you follow this recipe with attention and make it over and over again, you will quickly realize how easy this recipe is, and how it works every time.
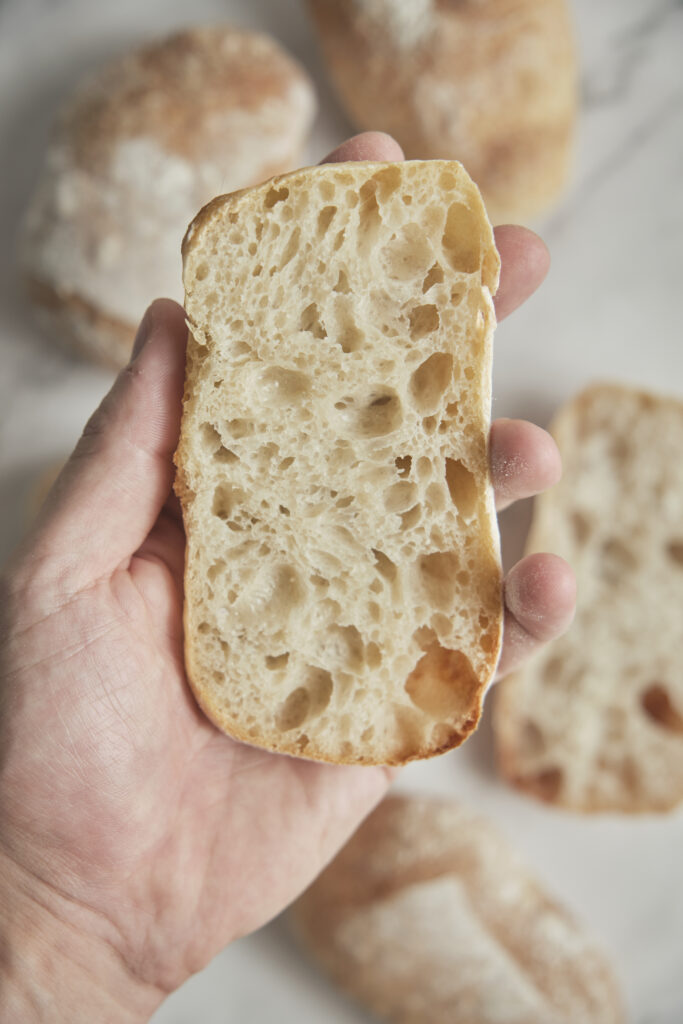
- Fluffy & light – For this recipe, I use a fairly simple high-hydration dough, which creates the signature airy crumb and soft, fluffy texture inside while still giving the bread a beautifully crisp crust.
- Basic ingredients – You only need 5 simple ingredients: flour, yeast, water, olive oil, and salt. Usually, you will have all of these already in your kitchen pantry.
Key Ingredients for Ciabatta Bread
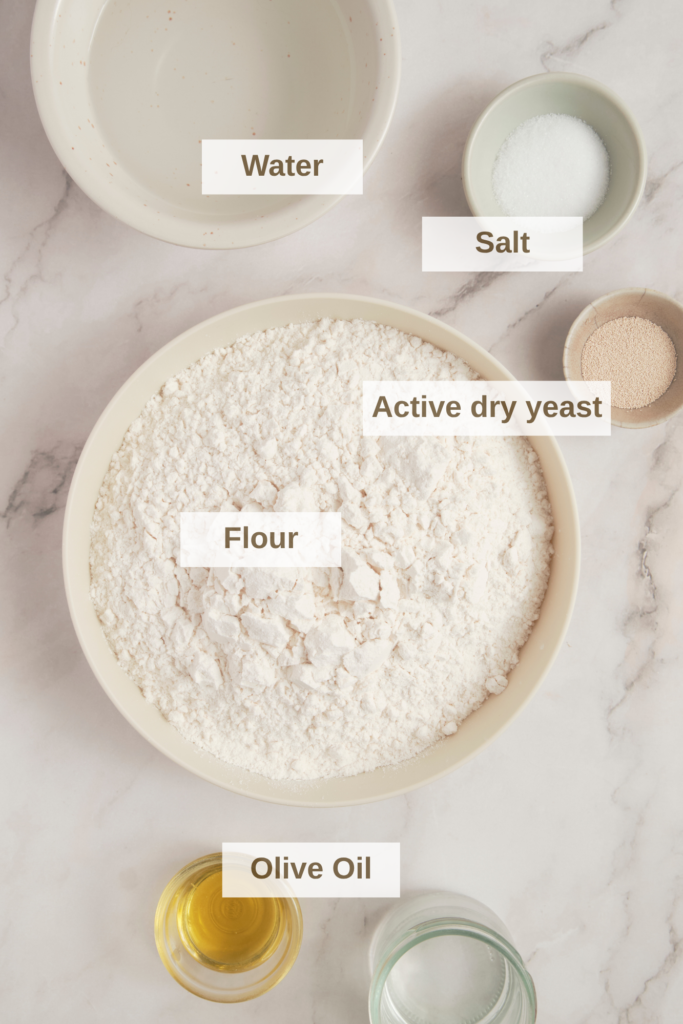
Flour – I use all-purpose Flour for this recipe.
Yeast – You can use instant or active dry yeast. Either one will work. I like to use active dry yeast. You just need to wait 5- 10 minutes once mixed with water, to allow it to activate first.
Water – I use a lot of water in this recipe, for a high-hydration dough.
Olive Oil – Olive oil adds a slight richness and subtle savory flavor to the dough.
Salt – Salt not only enhances the flavor of the ciabatta bread, but also helps control the fermentation process and strengthens the dough structure. This gives the bread better stability, volume, and overall texture.
How to make Ciabatta Bread
Take a look at the step-by-step photos below for a visual guide to the process. You’ll find the complete written recipe along with helpful tips in the recipe card further down the page.
Hydrate the flour (Autolyse) – This process, often described as a “self-digestion” of the dough, hydrates the flour and reduces kneading time, resulting in a better rise and easier handling. For this step, combine Flour with the first measure of lukewarm water (2 cups) and olive oil. Combine with your hands to form a stiff dough. Cover with a towel and let it rest for 30 minutes.

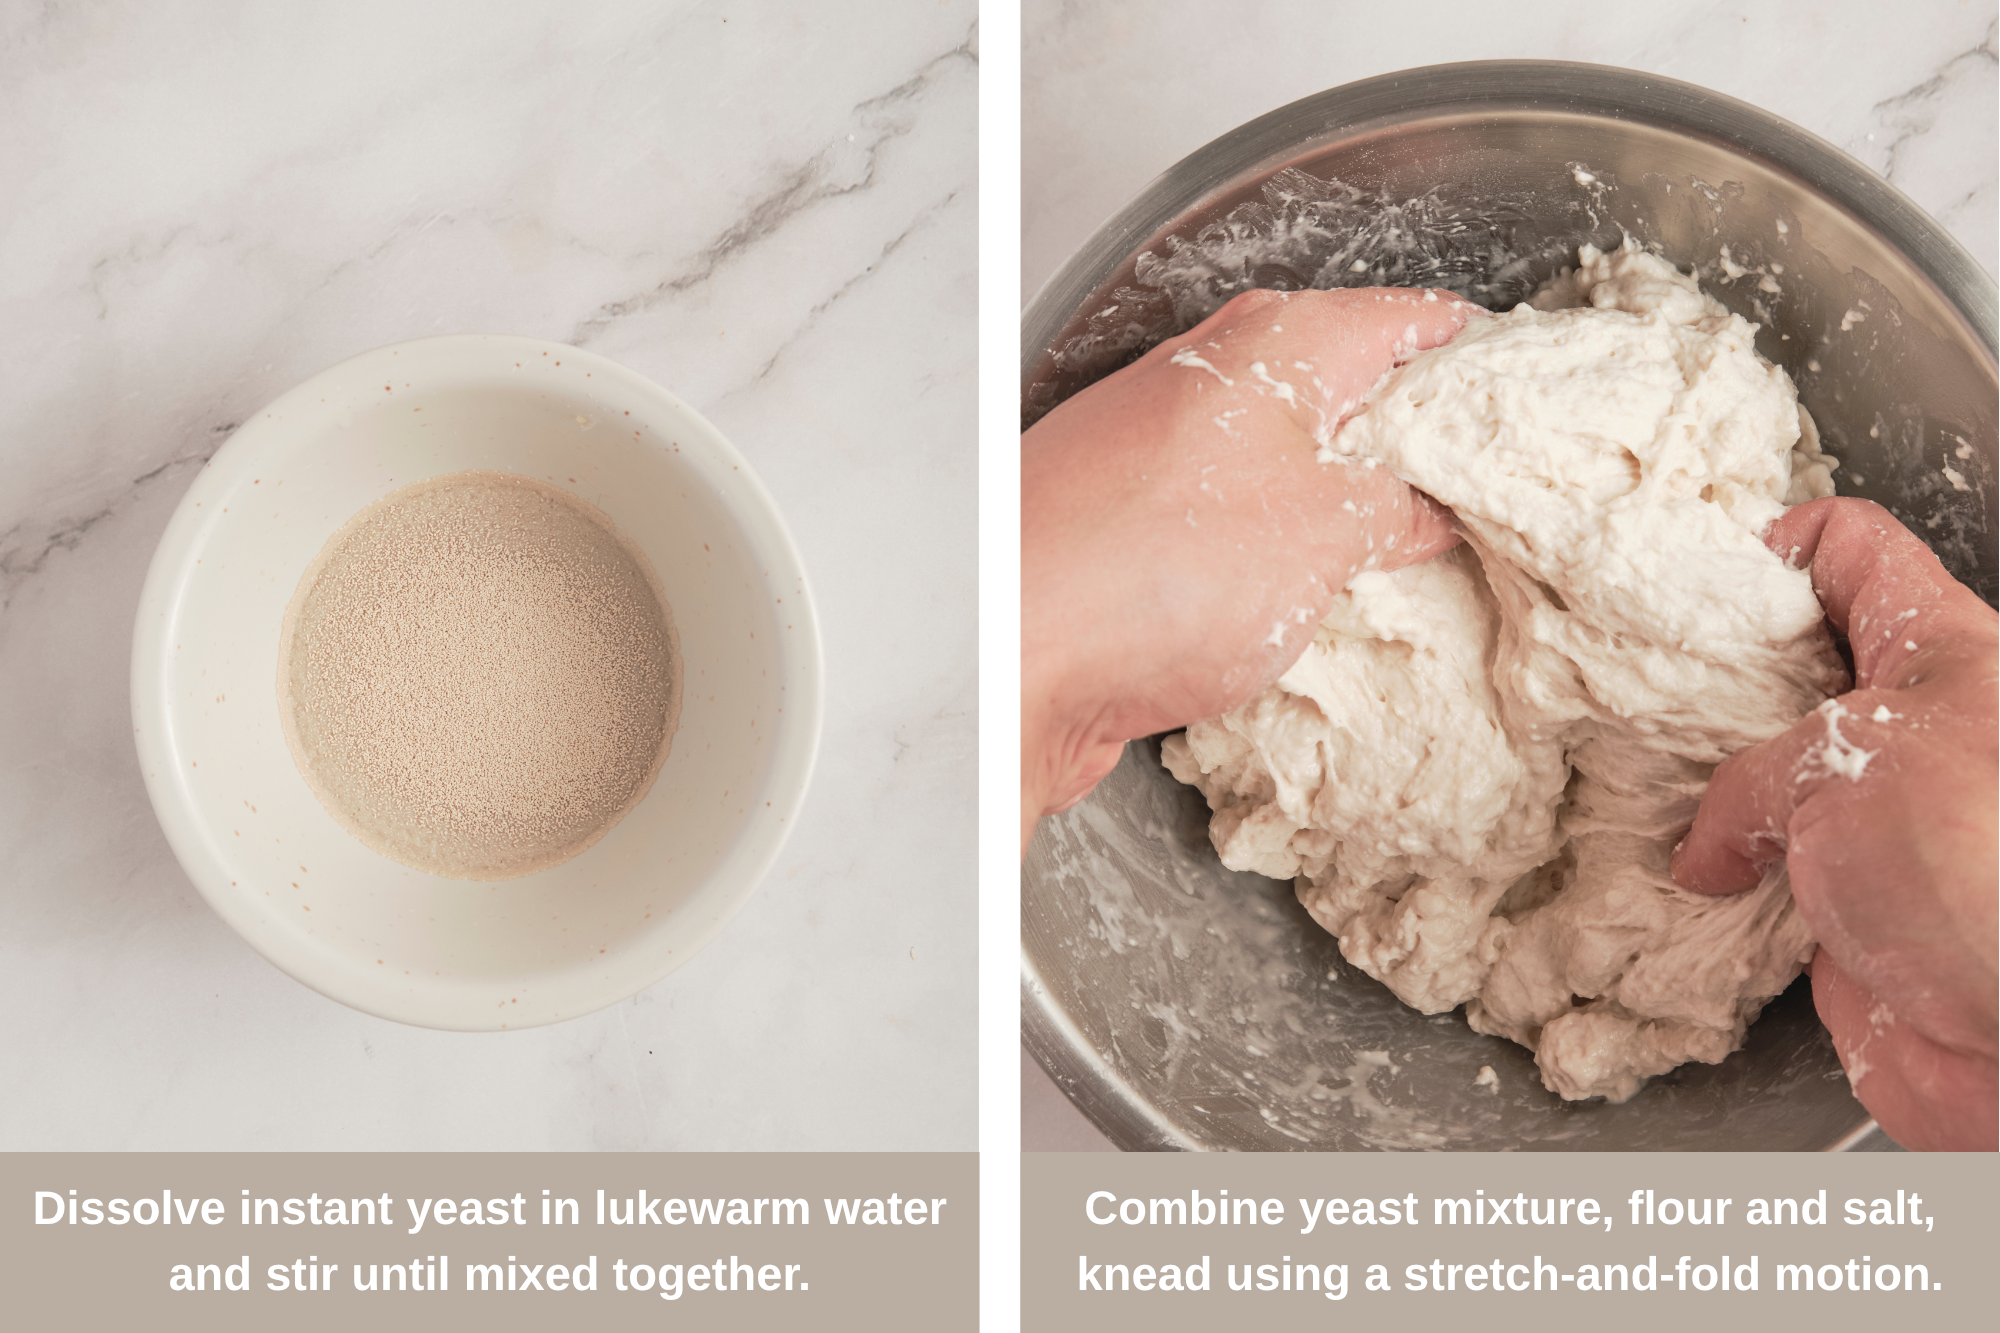
Dissolve the yeast – In a small bowl, dissolve instant yeast in the second measure of lukewarm water (3 tbsp) and stir to mix. Let it sit for 5 minutes until foamy on the surface.
Make the dough – After the 30-minute autolyse, add the yeast mixture and salt to the flour mixture. Knead the dough for about 5 minutes using a stretch-and-fold motion: lift one side of the dough, stretch it gently, then fold it over itself. Repeat this process for about 5 minutes, until the dough becomes smoother and more elastic.
Stretch & Fold – Let the dough proof for 2 hours, with a set of stretch and folds every 30 minutes. Lightly wet your hands with water, then stretch and fold the dough directly in the bowl by gently pulling one edge up and folding it into the center, rotating the bowl as you go. Keeping your hands wet makes the dough much easier to handle and prevents sticking.
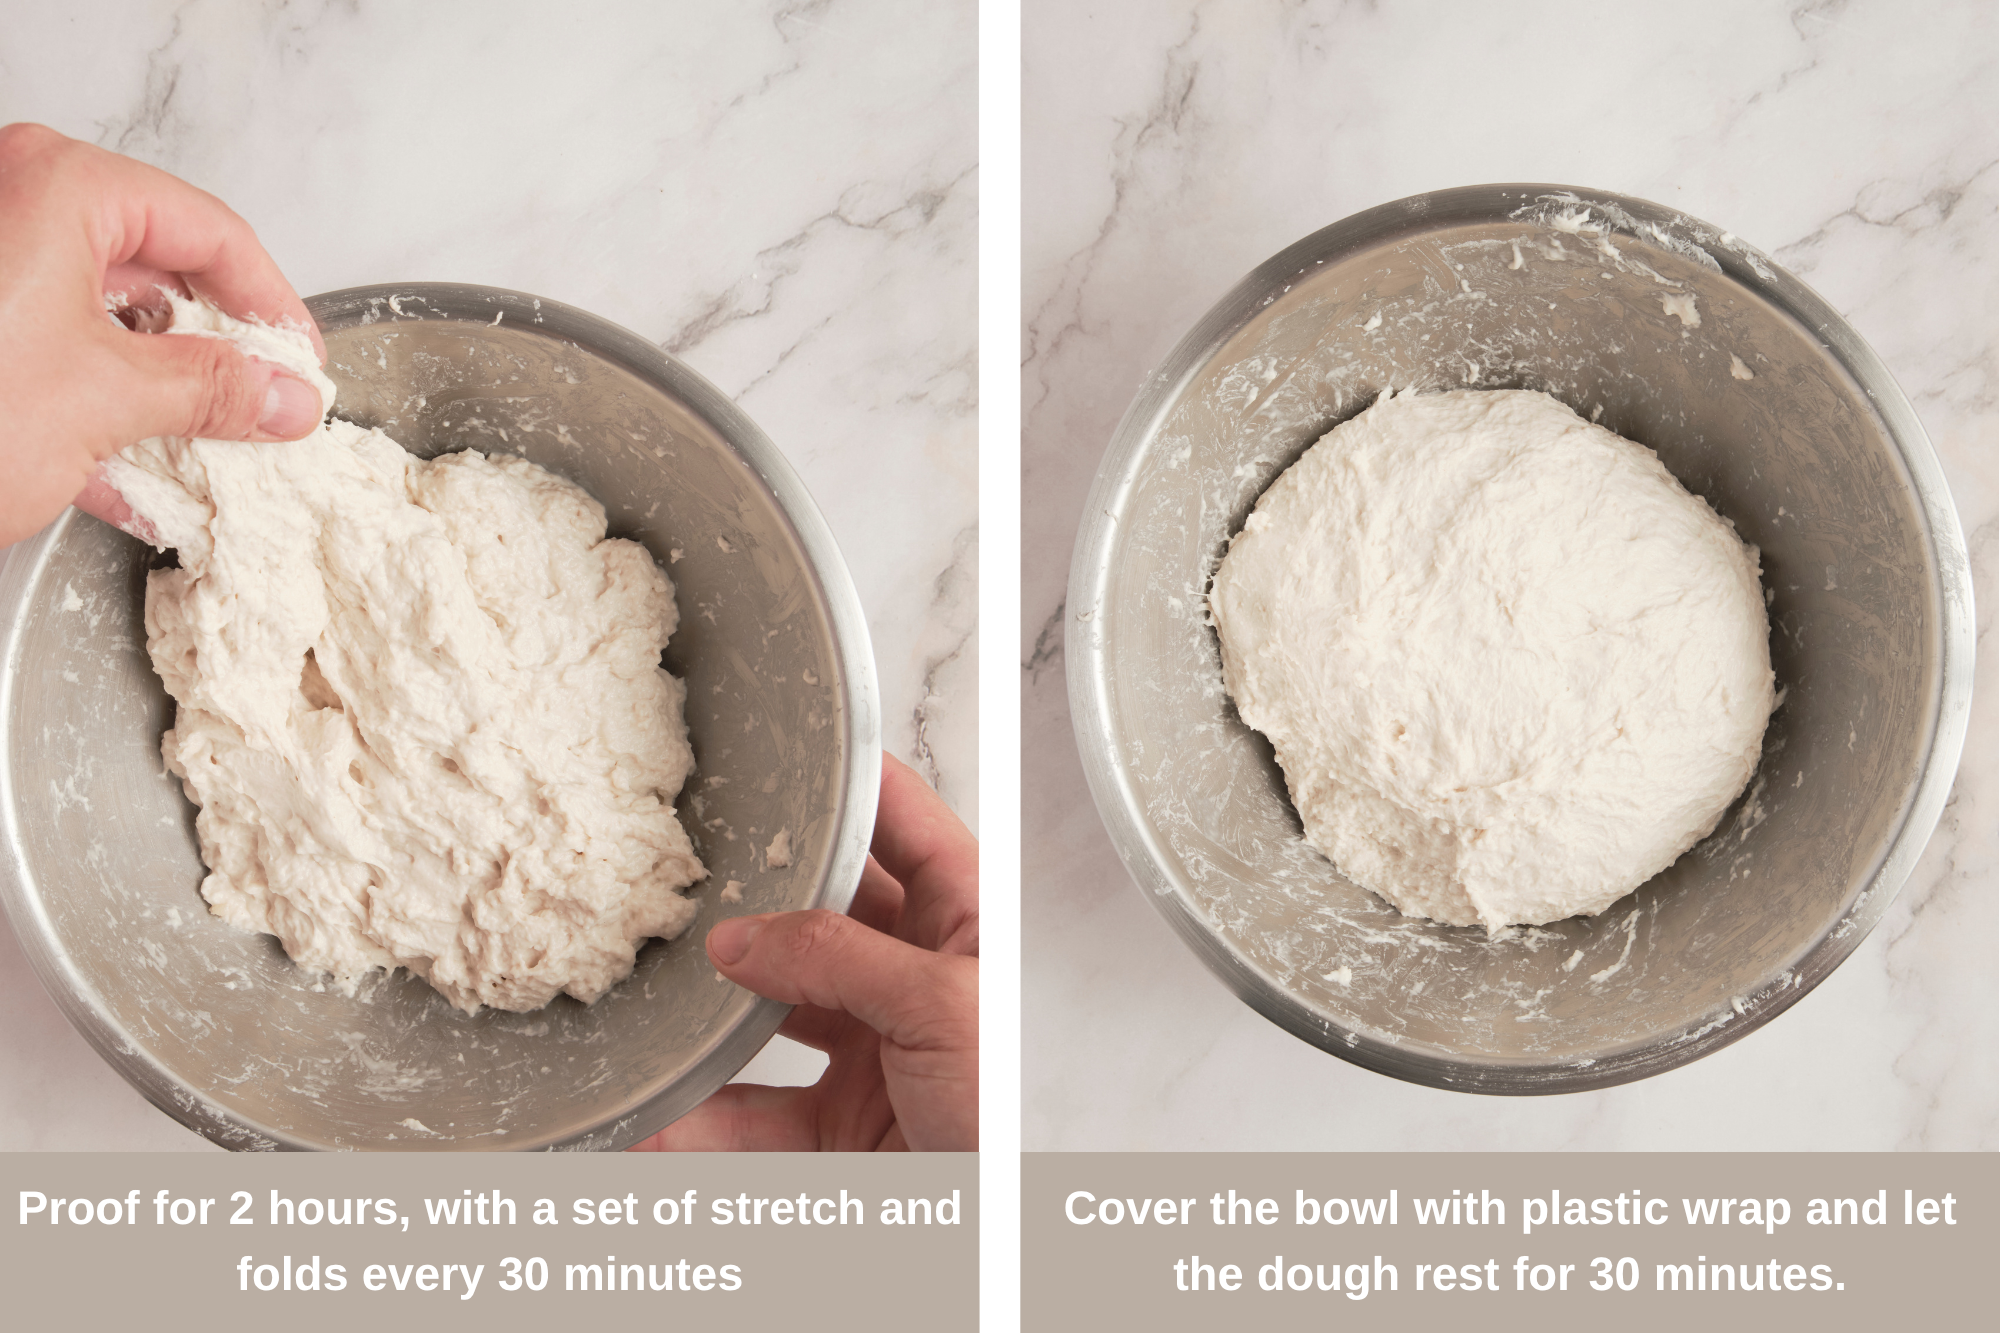
Repeat and Rest – Cover the bowl with plastic wrap and let the dough rest for 30 minutes. Then repeat with the next set of stretches and folds. In total, you’ll have four sets of stretches and folds, with a 30-minute resting time in between.
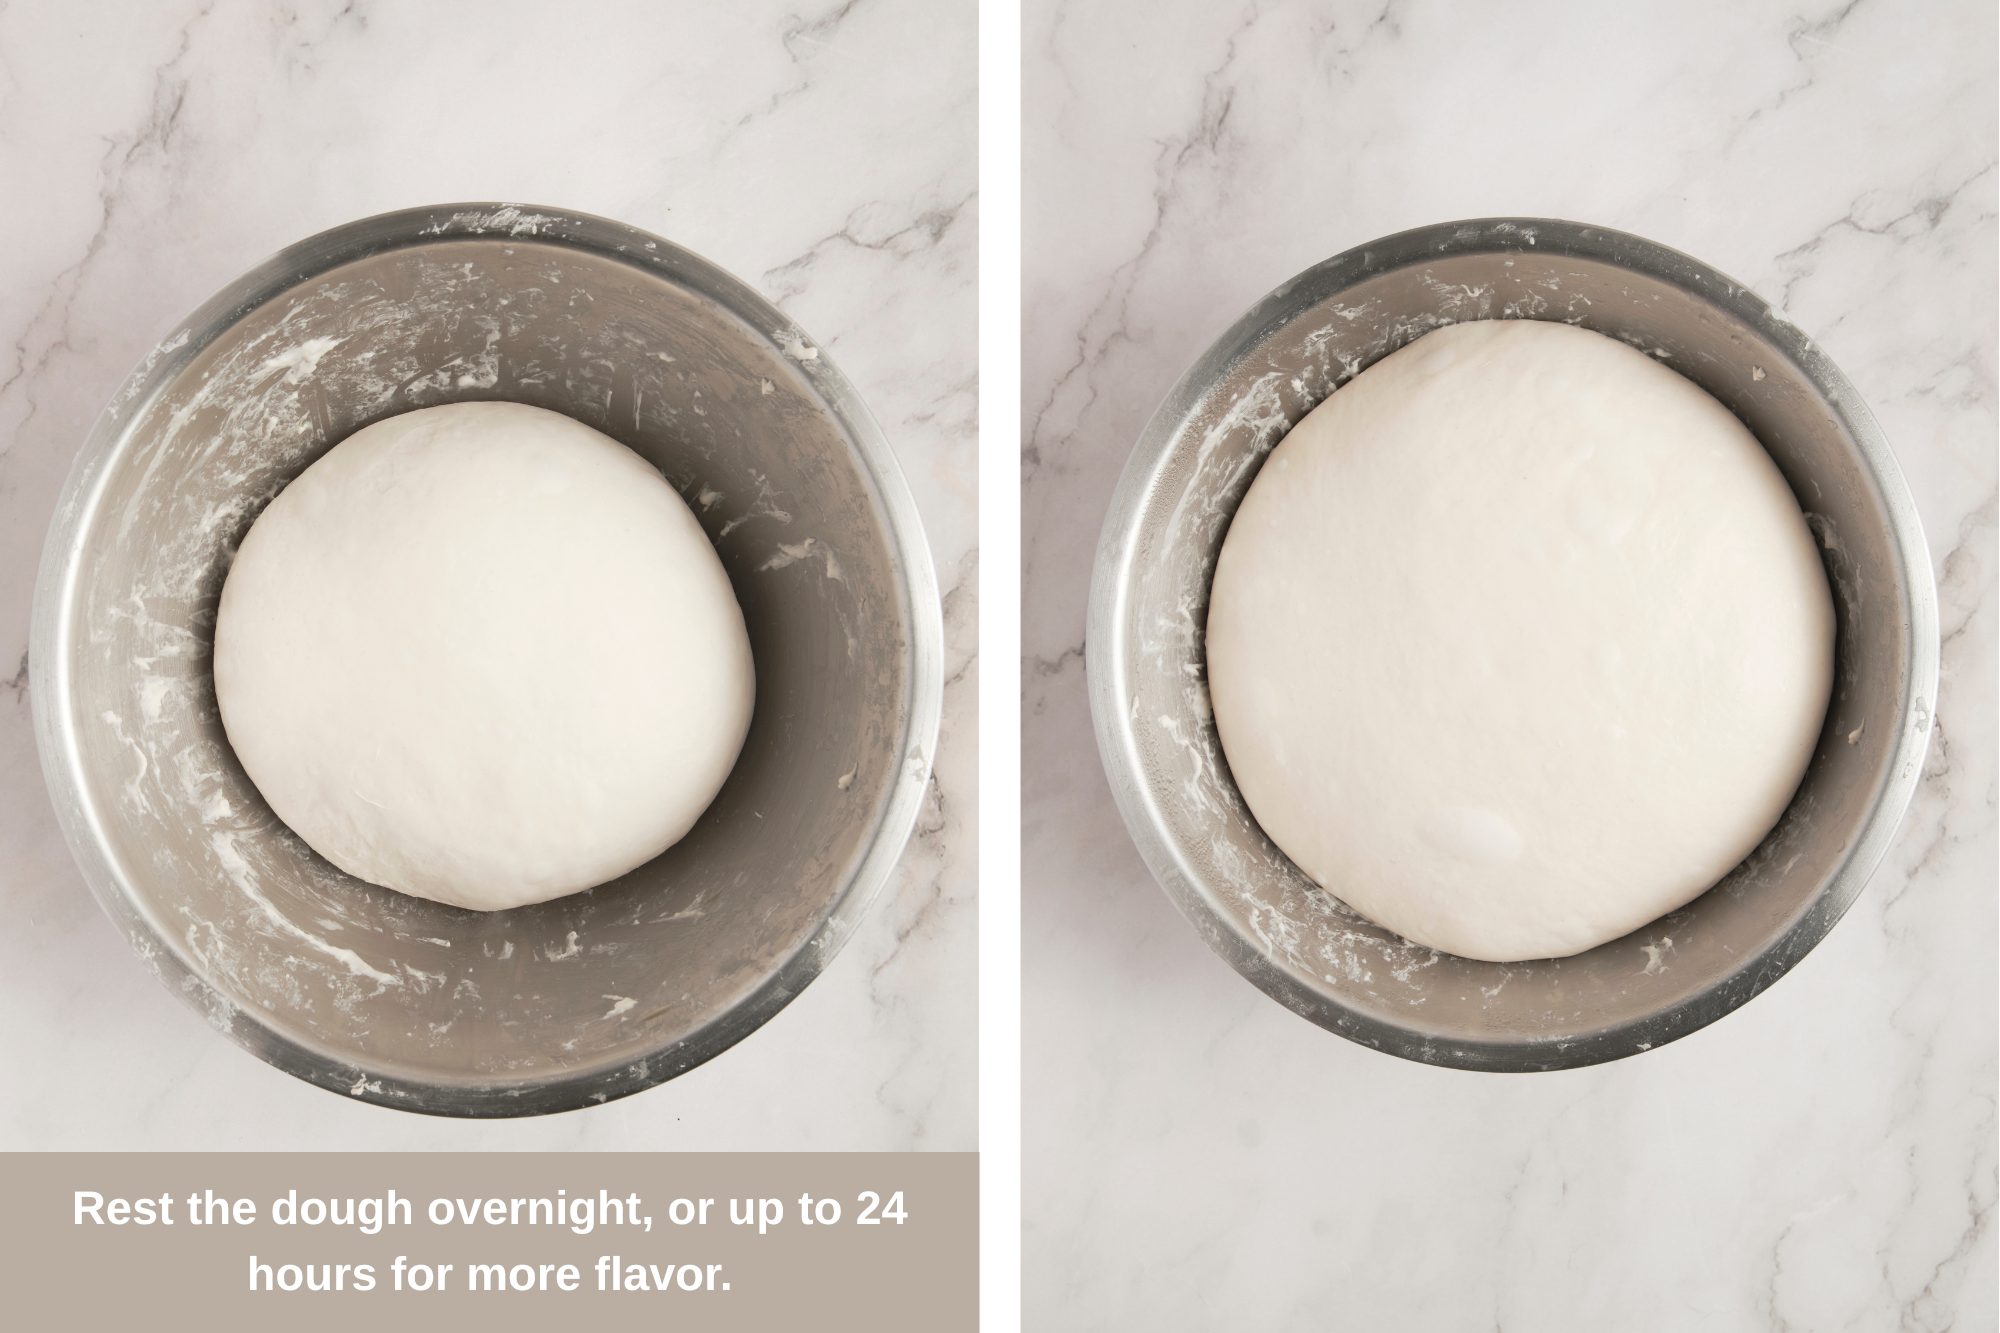
Cold Rest – Cover the bowl tightly—either with a lid or plastic wrap—and transfer it to the fridge. Let it rest overnight, or up to 24 hours for more flavor.
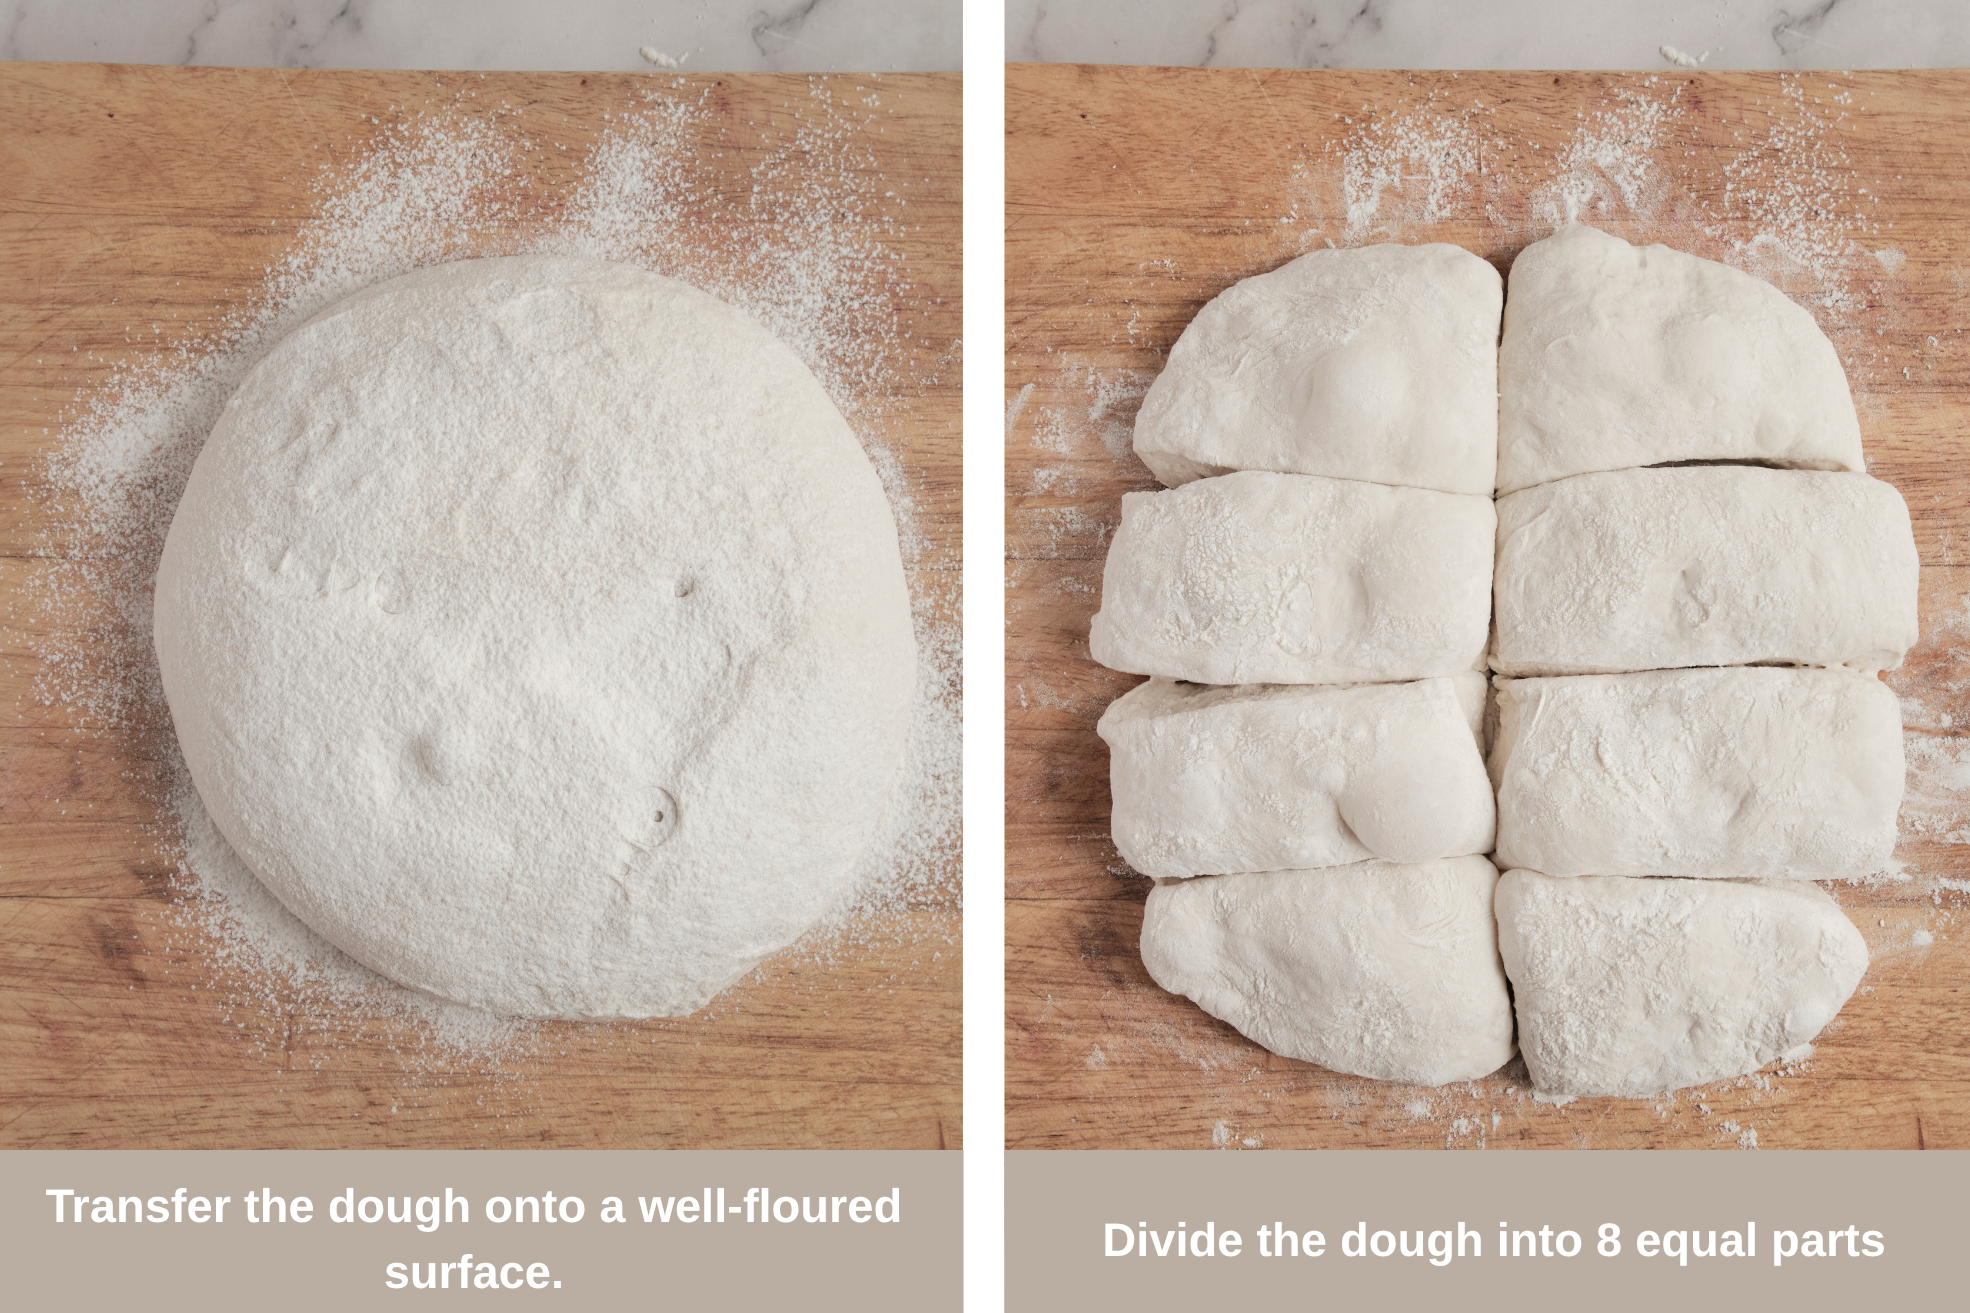
Shape – Transfer the dough onto a well-floured surface. The dough will still feel very sticky, which is completely normal. Lightly flour the top and gently shape it into a rectangle.
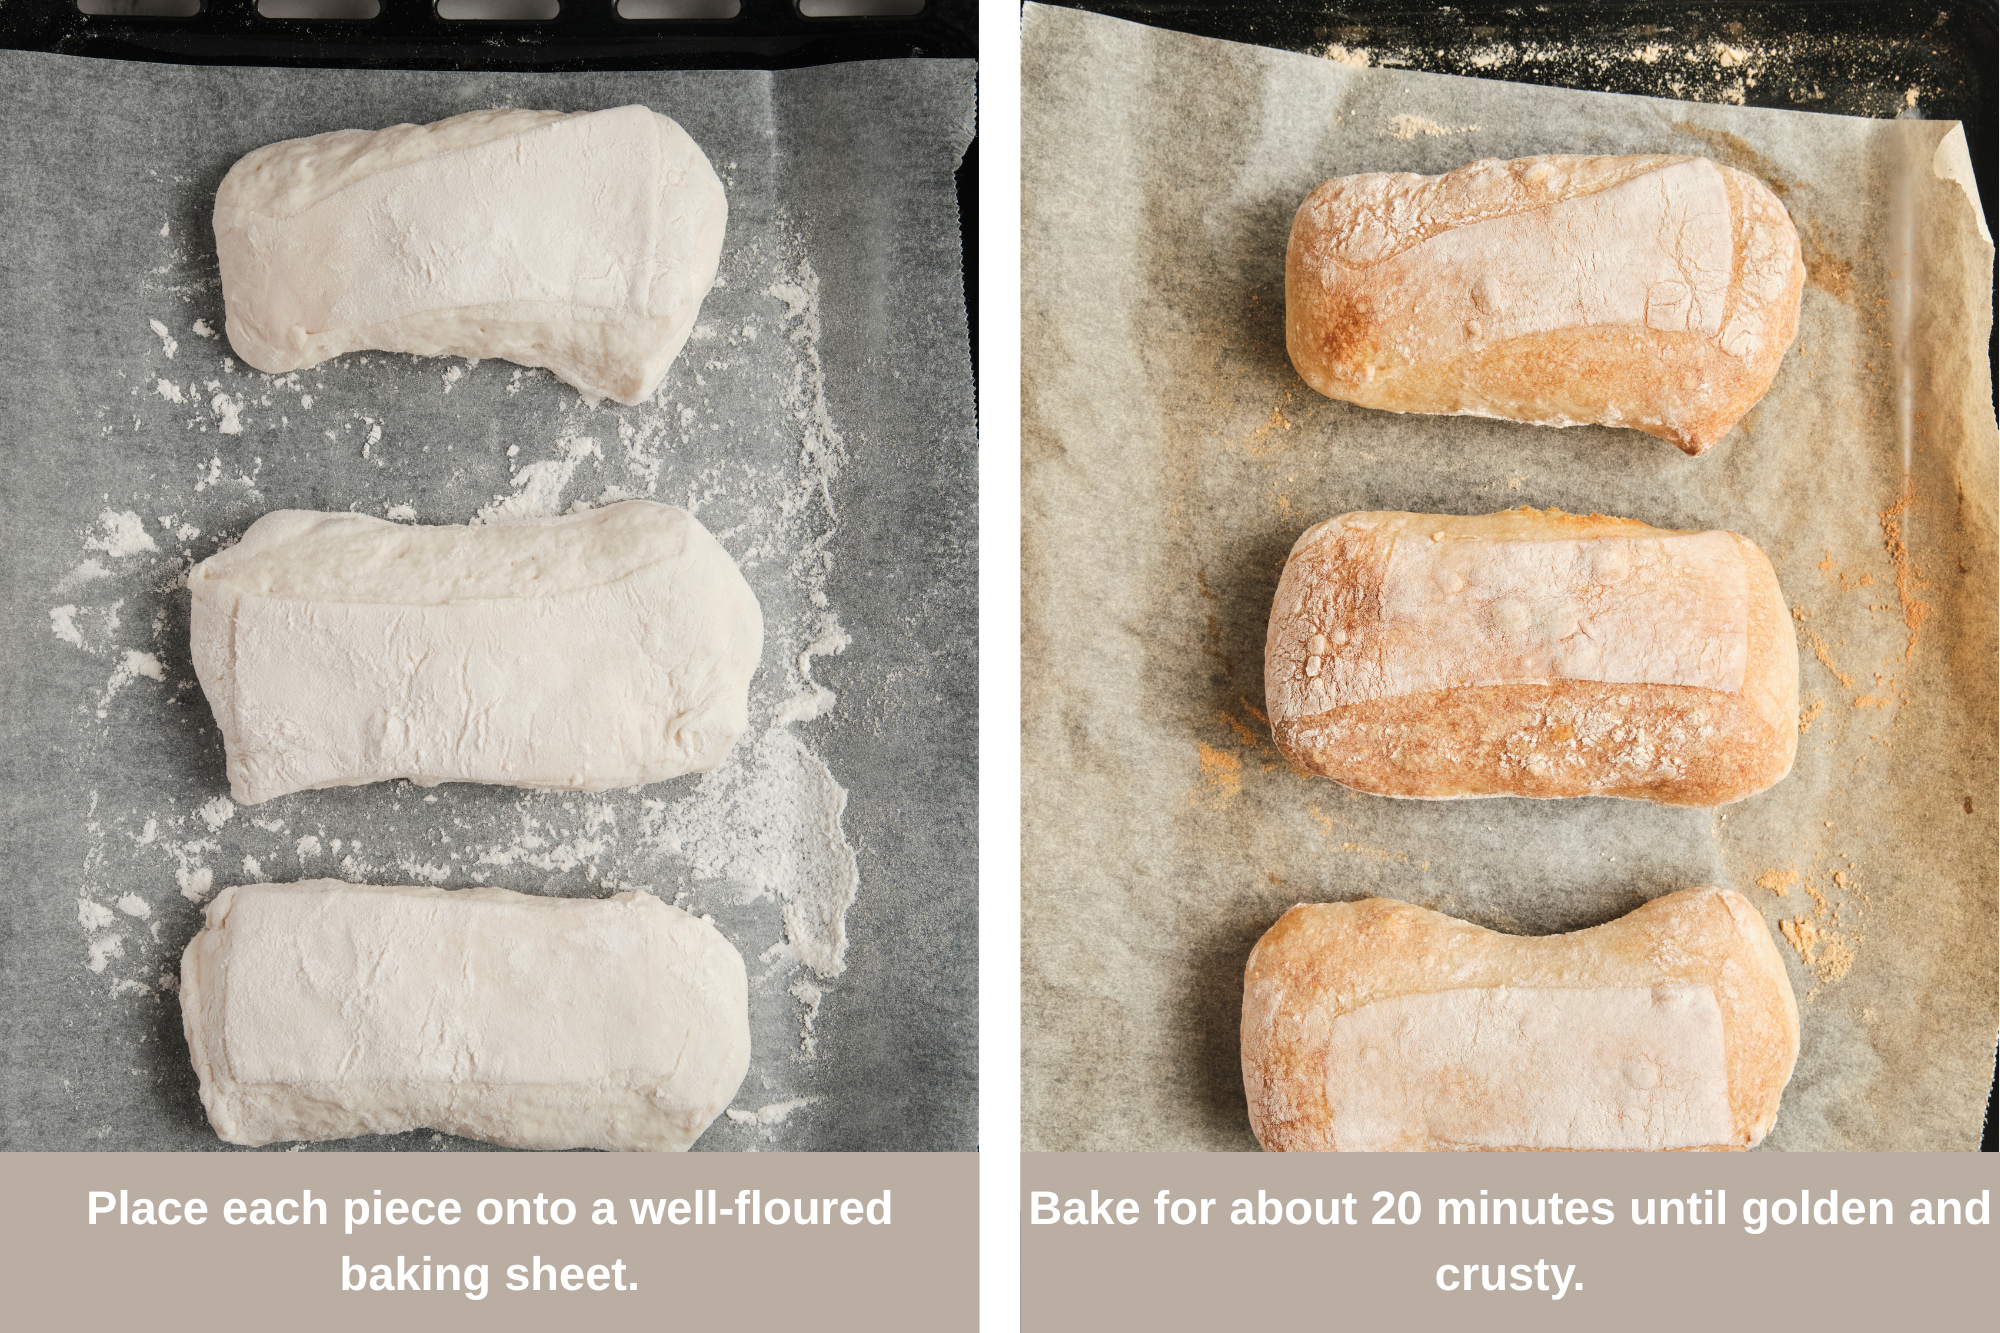
Divide – Divide the dough into 8 equal parts, and place each piece onto a well-floured baking sheet.
Final Proofing – Let the dough rest for about 45 minutes, until puffed up slightly.
Bake – Place a baking pan filled with water on the bottom rack of the oven and preheat it to 420°F. The steam helps create that crisp, golden crust. Once the oven is hot, place the dough into the oven and lightly spray it with water right away. Bake for about 20 minutes until golden and crusty.
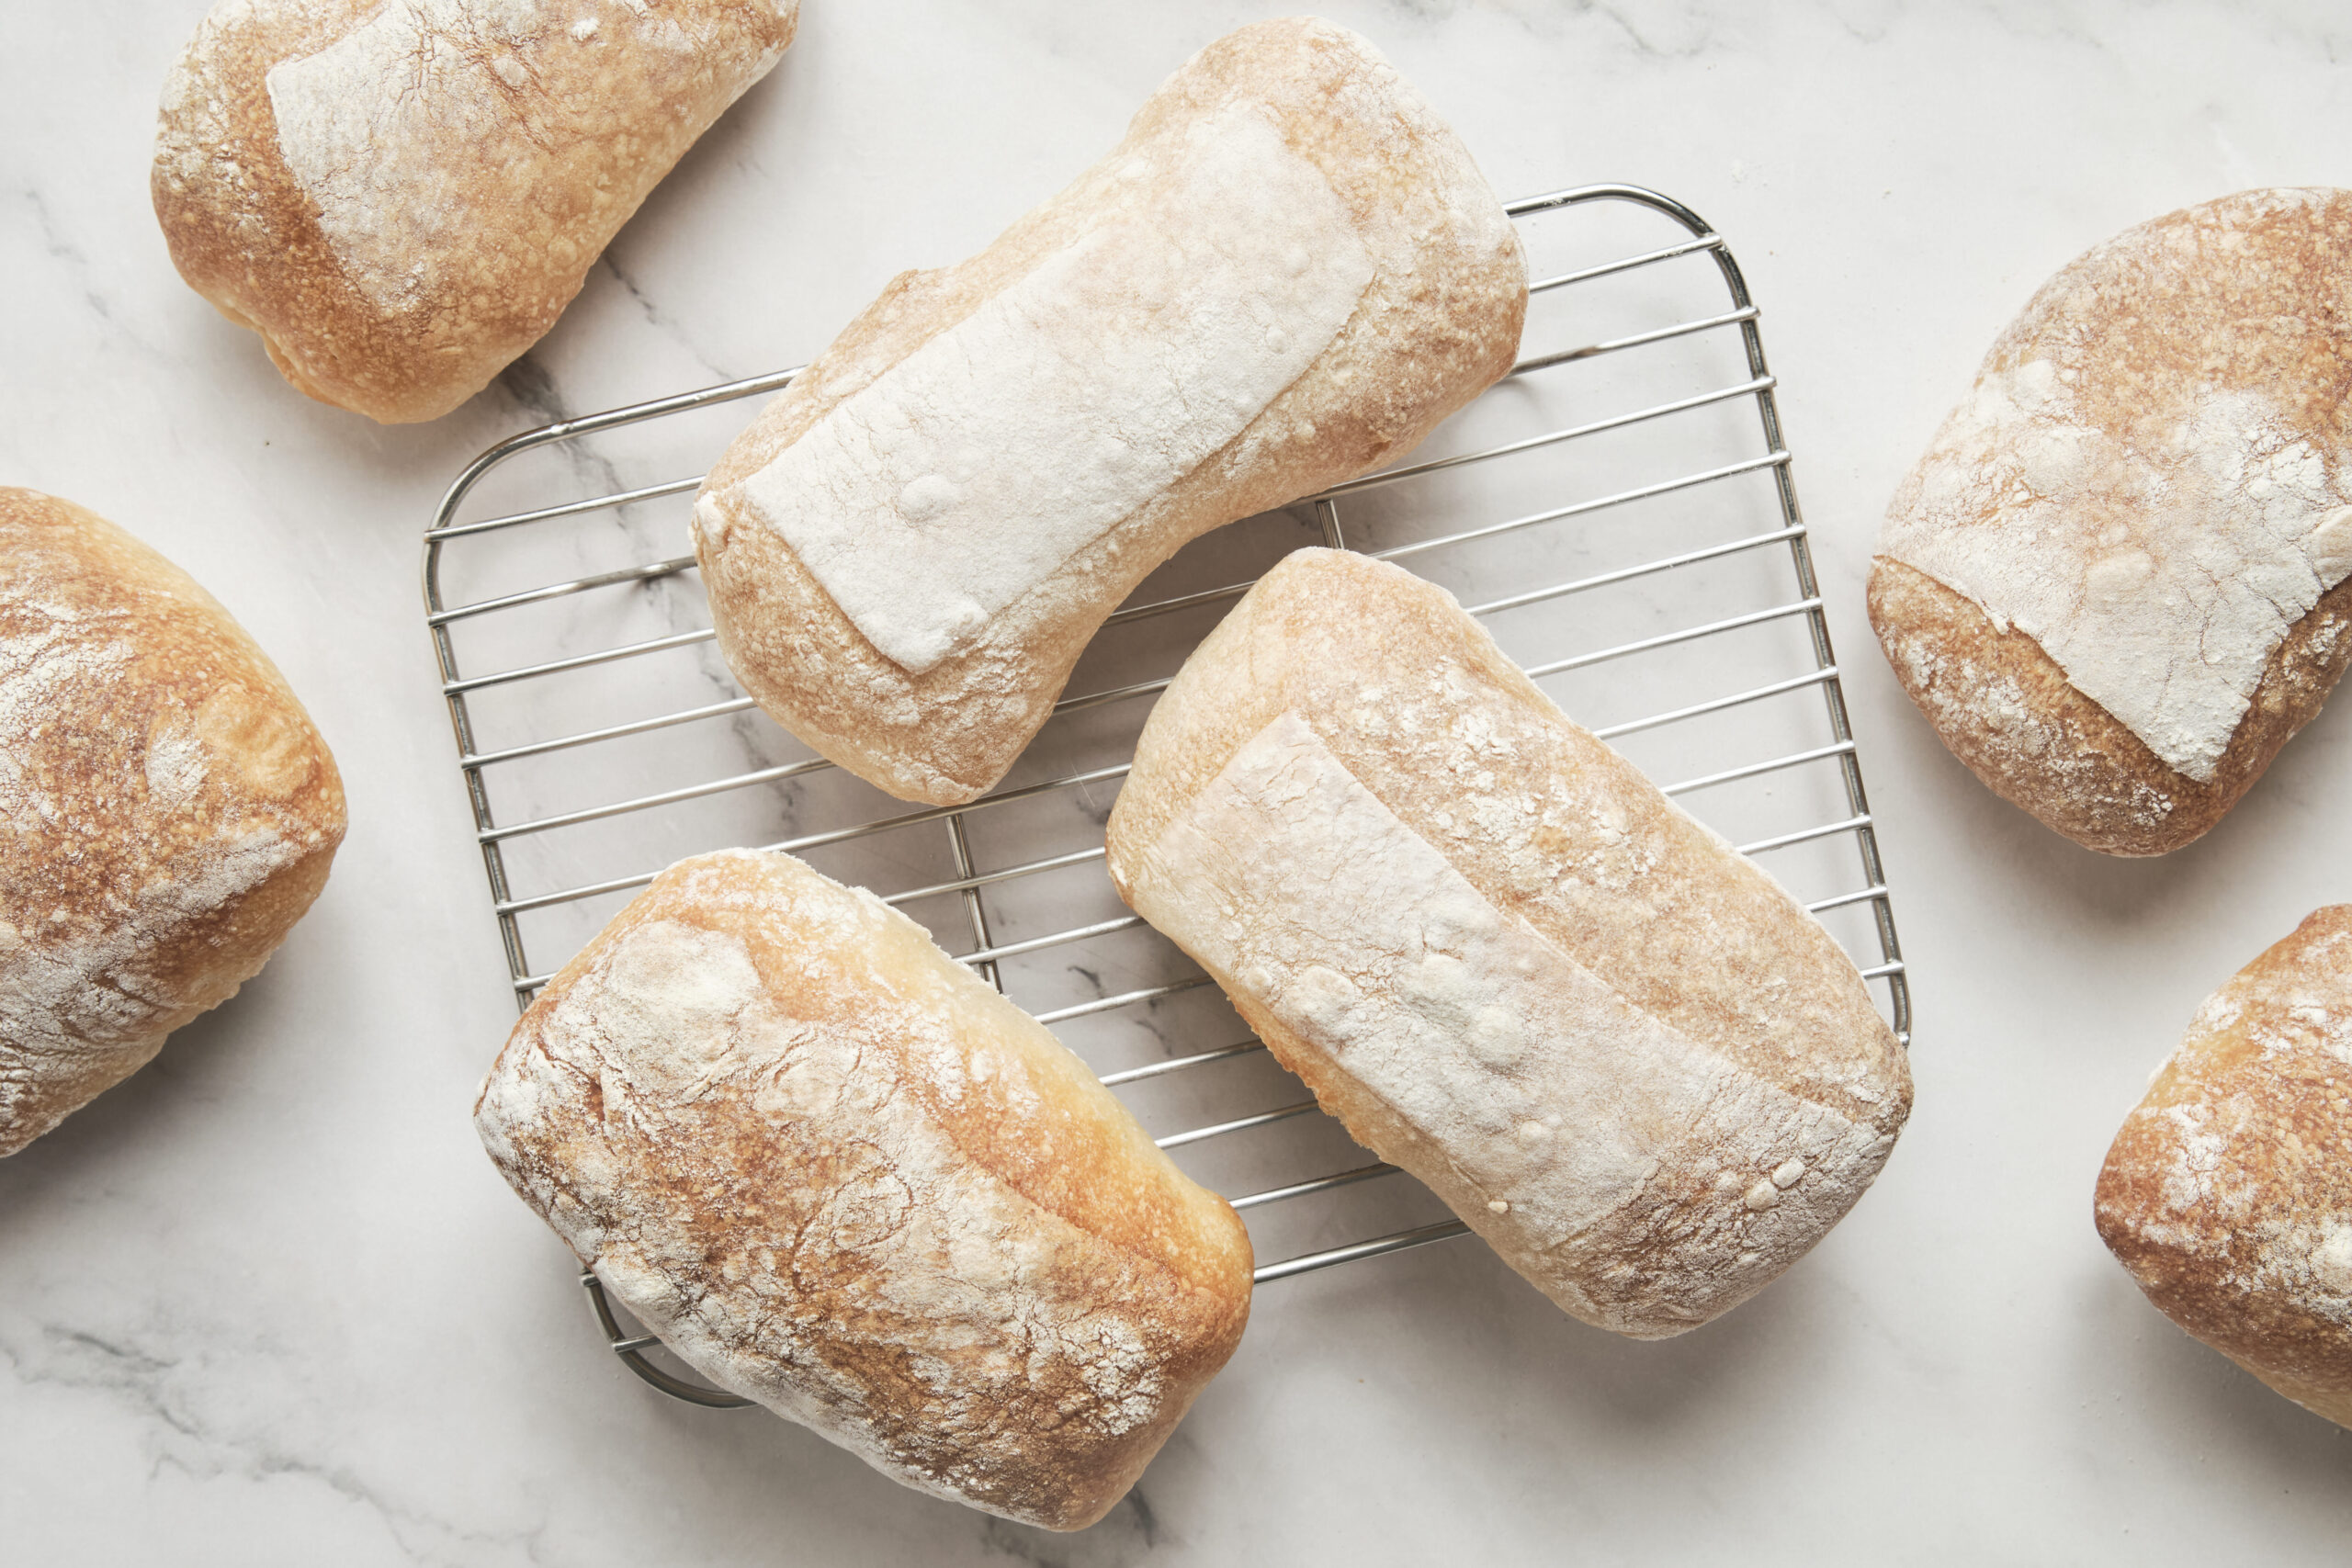
Cool down – Let the bread cool for about 20 minutes before slicing. To check if it’s fully baked, tap the bottom of the loaf lightly with your fingers — it should sound hollow when done.
From my Kitchen (Chef’s Tips)
Check the Yeast Activity – After mixing the yeast with lukewarm water, the mixture should turn foamy and develop a light yeasty aroma. That’s how you know the yeast is active and ready to use.
Create Steam in the Oven – Steam is the secret to ciabatta’s crispy, crackly crust. I like to place a tray of hot water on the bottom rack while the oven preheats for that bakery-style finish.
Use a Bench Scraper – Ciabatta dough has a very high hydration, which makes it sticky and tricky to handle. A bench scraper makes shaping and transferring the dough much easier, and a little flour can help if needed.
How to Serve Ciabatta Bread
- Serve with Fresh Salads – Ciabatta bread pairs beautifully with light and fresh salads. I love serving it alongside a crisp spring salad or a juicy Italian tomato salad to soak up all the delicious dressing.
- Pair with Chicken Dishes – The crispy crust and airy texture make ciabatta perfect for hearty chicken meals. Try it with creamy Marry Me Chicken or alongside Air Fryer Caprese Chicken for an easy and comforting dinner.
- Make a Hearty Sandwich – Ciabatta is one of my favorite breads for sandwiches. Fill it with crispy German schnitzel, caramelized onions, and your favorite sauce for a rich and satisfying meal.
More Homemade Bread Recipes
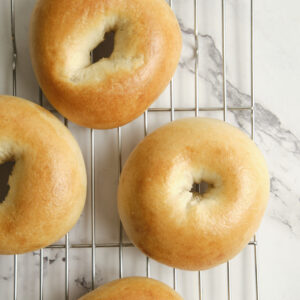
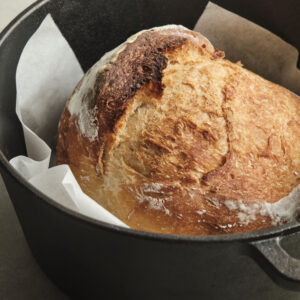
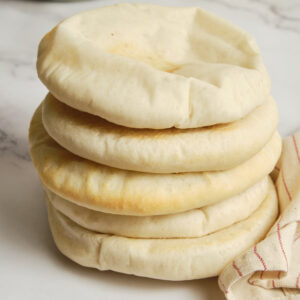
If you love baking homemade bread, there are plenty more recipes to try. My homemade plain bagels are perfectly chewy and great for breakfast, while the soft pita bread is ideal for wraps and dipping. For an easy artisan-style loaf, the no knead Dutch oven bread is one of my favorite simple bread recipes with a crispy crust and soft interior.
How to make Ciabatta Bread
Ingredients
Method
- In a large bowl, mix the flour with the oil and the first portion of water (395g). Stir it together with a spatula or your hands until you get a rough, firm dough. Cover it with a clean kitchen towel and let it rest for about 30 minutes—this step helps the flour fully absorb the water and sets the foundation for the dough.
- After the dough has rested, mix the remaining water (50g) with the yeast and add it to the bowl along with the salt. Work it into the dough by gently pinching and pressing it through with your fingers. Then start using a stretch-and-fold motion—lift part of the dough, stretch it up, and fold it back over itself. Turn the bowl slightly and repeat, working your way around. Continue like this for about 5 minutes, until the dough starts to feel smoother and more cohesive.
- Once you’re done mixing, transfer the dough to a lightly oiled bowl or container. Cover it with a lid or a clean kitchen towel.
- Let the dough proof for about 2 hours. During this time, do a set of stretch and folds every 30 minutes—so you’ll have four rounds in total.
- For each set, use the same motion as before: reach under the dough, lift and stretch it up, then fold it back over itself. Turn the container slightly and repeat until you’ve worked your way around the dough. Cover it again and let it rest for another 30 minutes before the next round.
- Once you’ve finished all your stretch and folds, cover the bowl tightly—either with a lid or plastic wrap—and transfer it to the fridge. Let it rest overnight, or up to 24 hours for more flavor.
- When you’re ready to bake, line a tray with baking paper and dust it lightly with flour. Generously flour your work surface, then sprinkle some flour over the top of the dough as well. Gently turn it out onto the surface—the dough will be quite sticky, so don’t be shy with the flour here.
- Gently press the dough into a square, roughly 24 x 24 cm. Add a bit more flour if needed to keep it manageable. Cut it into 8 portions, then work with one piece at a time.
- Carefully transfer it to your prepared baking tray, flipping it so the floured side is now facing up. Lightly tuck the edges underneath and shape it into a loose rectangle—don’t overwork it. Repeat with the second piece, leaving enough space between them so they can rise and spread slightly.
- Loosely cover the tray with plastic wrap or a lid and let the dough rest in a warm spot for about 45 minutes to 1 hour. It should puff up slightly. To check if it’s ready, gently press it with your fingertip—if the indentation slowly springs back, you’re good to go.
- While the dough is resting, preheat your oven to 220°C / 425°F. Give it a good 20 minutes so it’s fully heated and ready to go.
- Once the dough has risen, place the tray in the oven and bake for 18–20 minutes. The ciabatta should be golden brown and sound hollow when tapped on the bottom—this is how you know it’s done.
- Take the bread out of the oven and let it sit on the tray for about 5 minutes. Then transfer it to a wire rack and allow it to cool completely before slicing.
Notes
- Check the Yeast Activity – After mixing the yeast with lukewarm water, the mixture should turn foamy and develop a light yeasty aroma. That’s how you know the yeast is active and ready to use.
- Create Steam in the Oven – Steam is the secret to ciabatta’s crispy, crackly crust. I like to place a tray of hot water on the bottom rack while the oven preheats for that bakery-style finish.
- Use a Bench Scraper – Ciabatta dough has a very high hydration, which makes it sticky and tricky to handle. A bench scraper makes shaping and transferring the dough much easier, and a little flour can help if needed.